GeoServer
The GeoServer is the geo-spatial server of the platform that allows for the publishing and management of geo-spatial data and services. It provides powerful capabilities for managing and serving geo-spatial data.
Upon logging in as an administrator, the following administrative view is displayed:
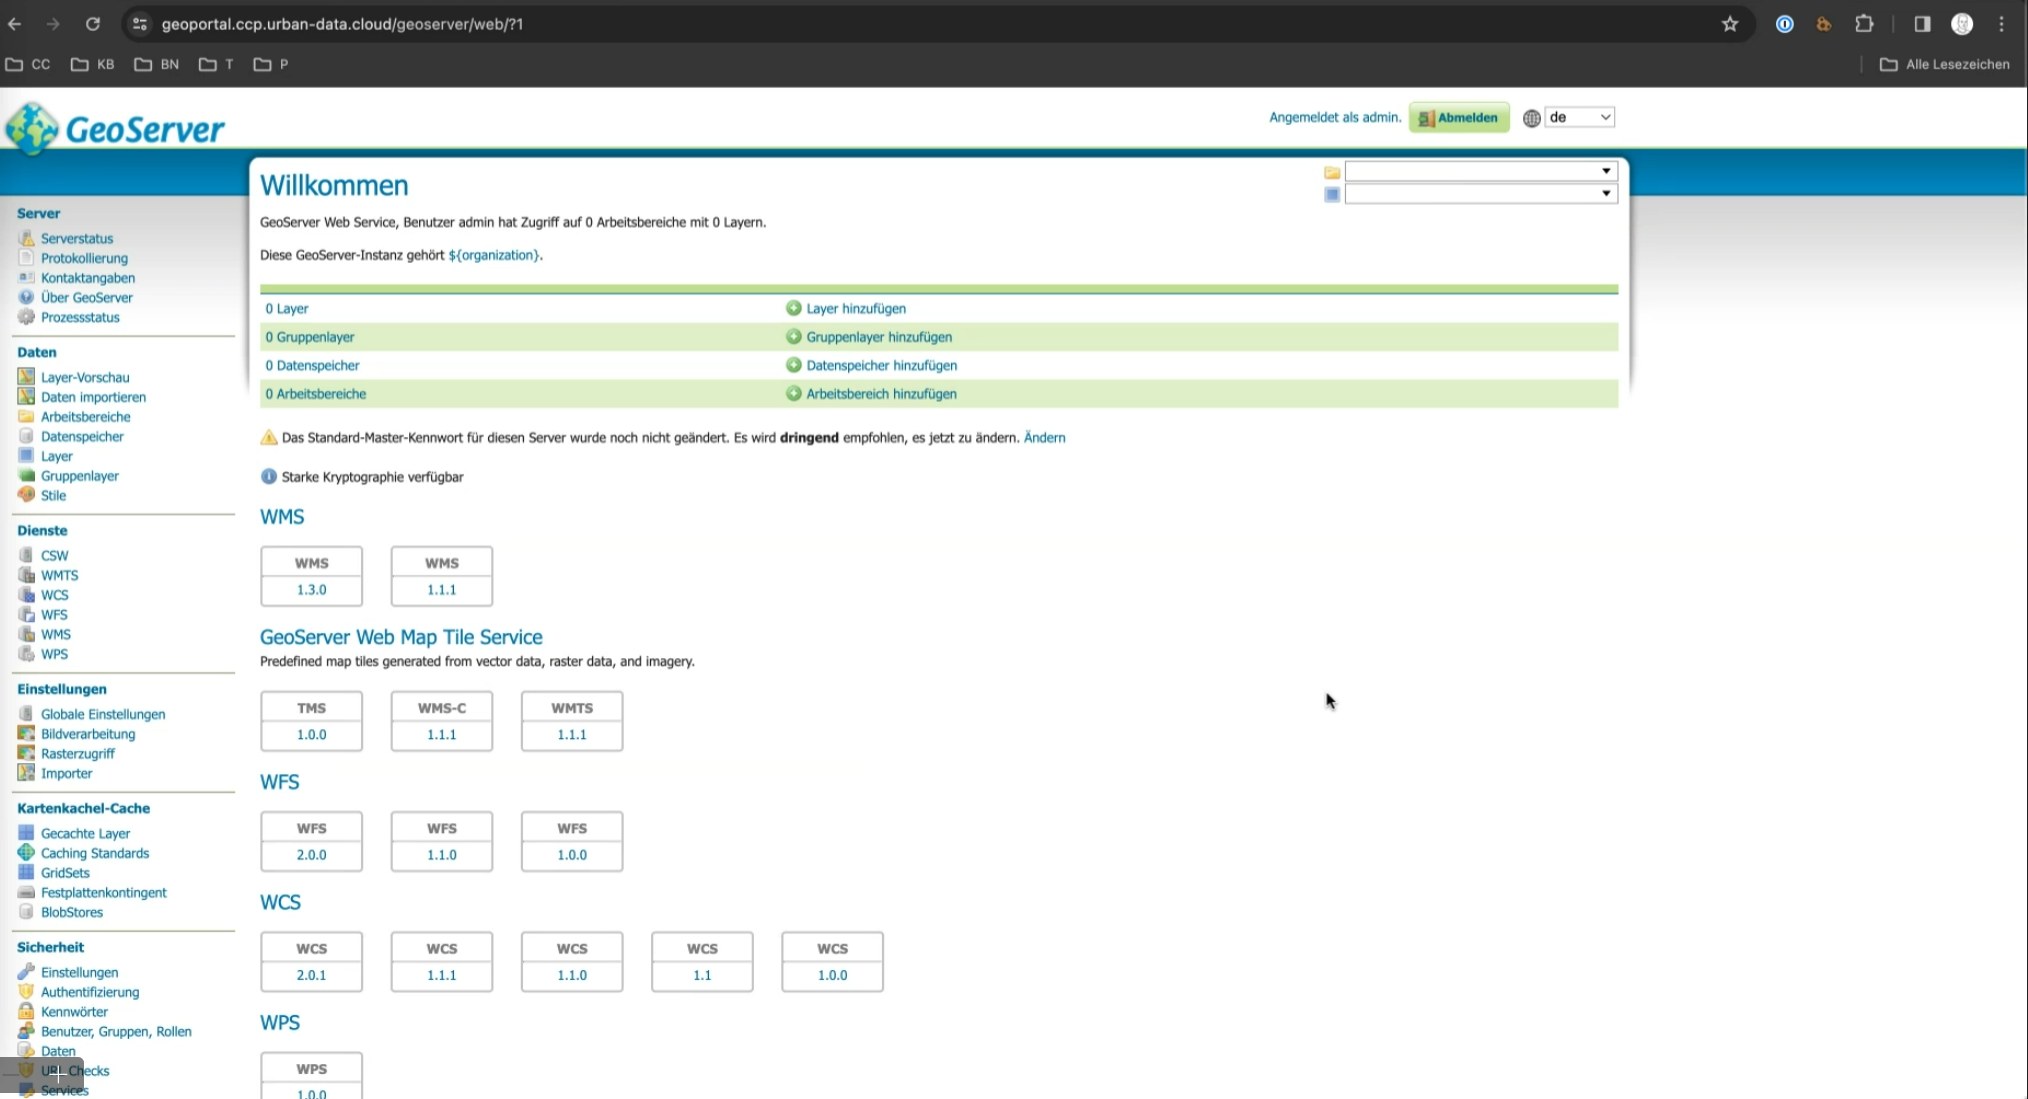
The GeoServer is organized into data spaces (workspaces) and data layers. Data layers are geo-spatial datasets like shapefiles or databases published for web mapping. Data spaces organize layers, allowing users to manage, group, and share related data.
Data Layer Management
New layers are defined within the menu group "Data".
Data Space Management
A data space is equivalent to a "Workspace". Data spaces are disjoint in terms of roles and access.
Each data space can be configured independently, allowing for tailored management of data accessibility. For each data space, keycloak roles can be configured to control access.
Public Access to Workspaces
- Workspace ds_open_data: Resources (e.g., data layers or services) created in the ds_open_data workspace are publicly accessible and do not require a login.
- Custom Workspaces: Additional workspaces can be manually configured to allow public access. This configuration must be done in the workspace settings.
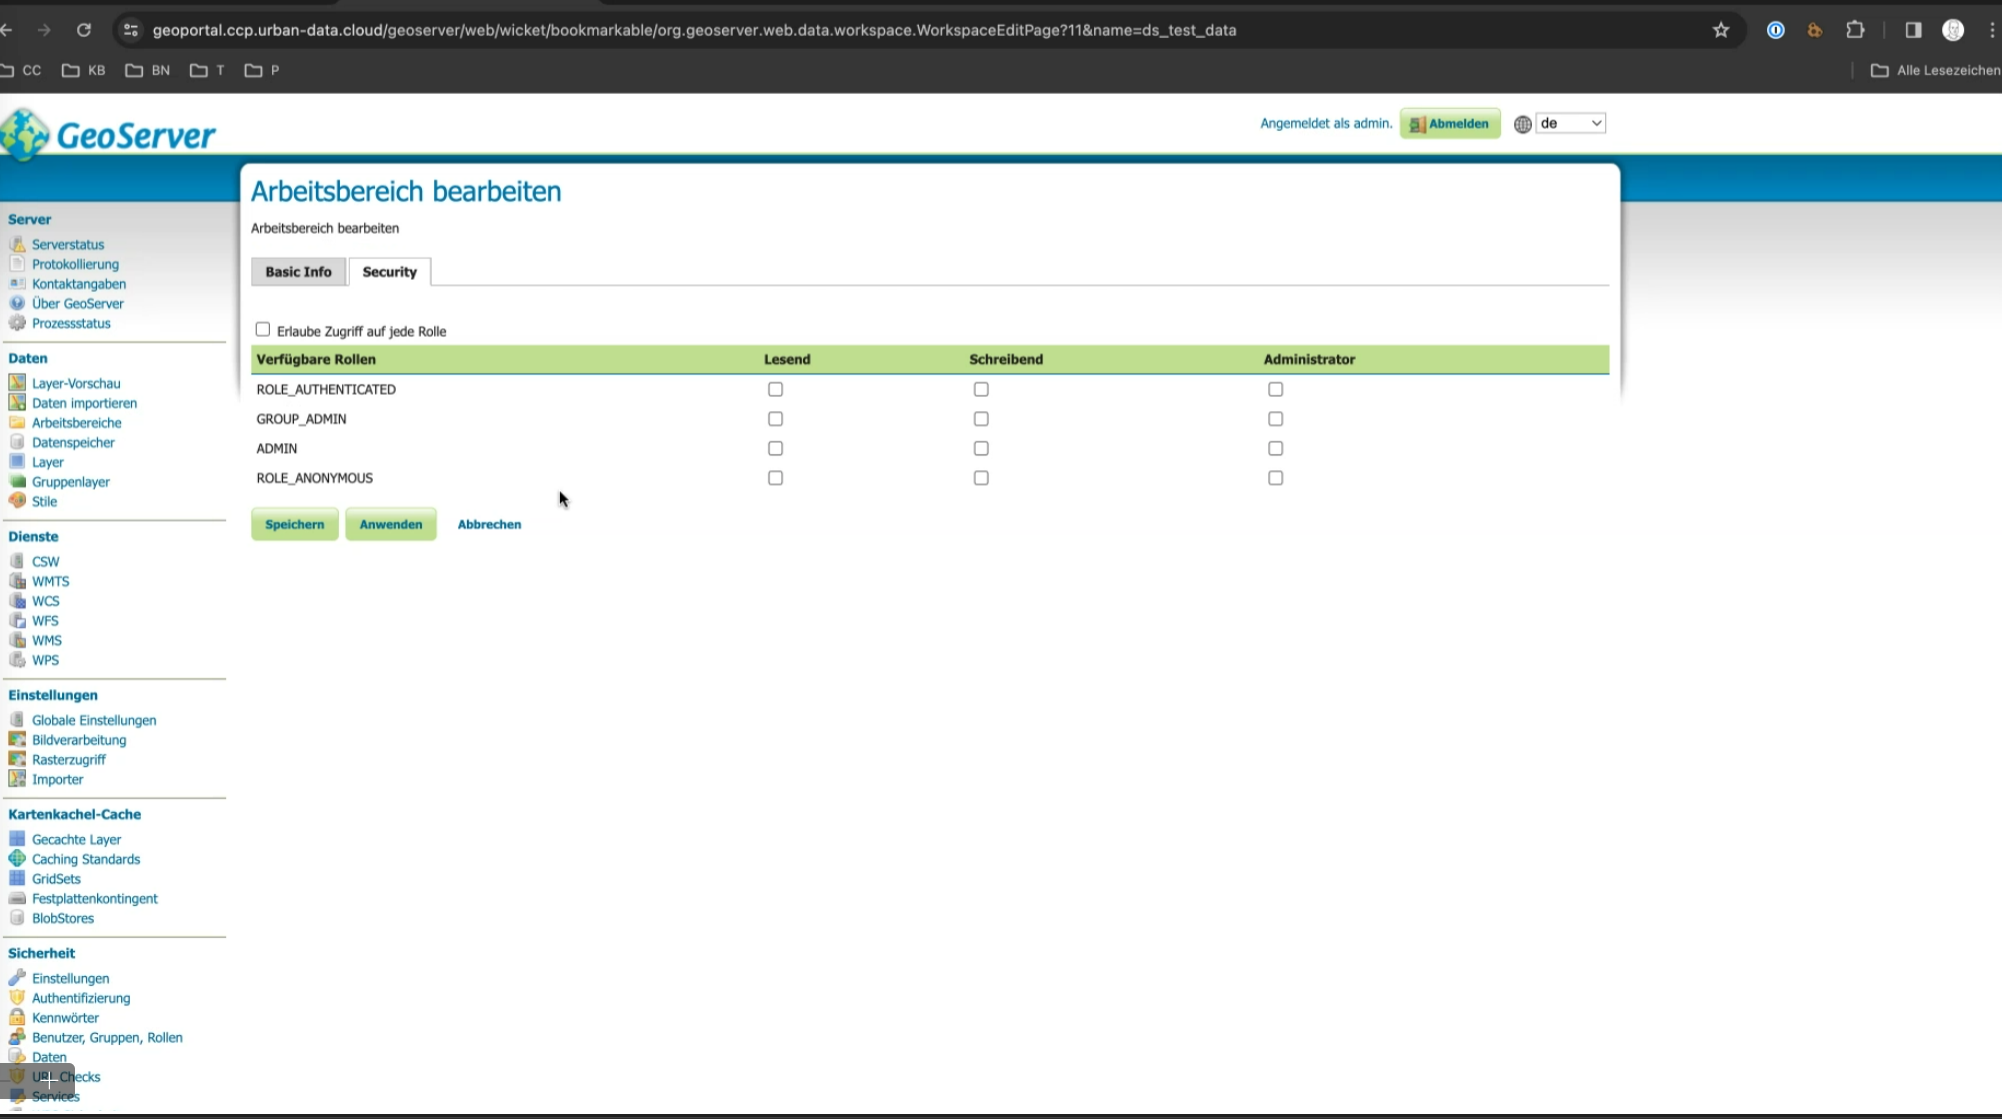
OIDC integration
Unfortunately, the OIDC integration of the GeoServer is not configurable over the GeoServer API. This has to be done manually.
The configuration is described in the GeoServer Keycloak Plugin Documentation in detail.
To get the GeoServer ODIC Integration up and running, the following steps have to be executed.
Important: For a working integration with the API Management, the authorization header AND the Keycloak Auth Service have to be configured.
Role service
The first step is to configure the role service connection to Keycloak. This service definition will download defined roles in the background, so that you can use them as local roles in the GeoServer.
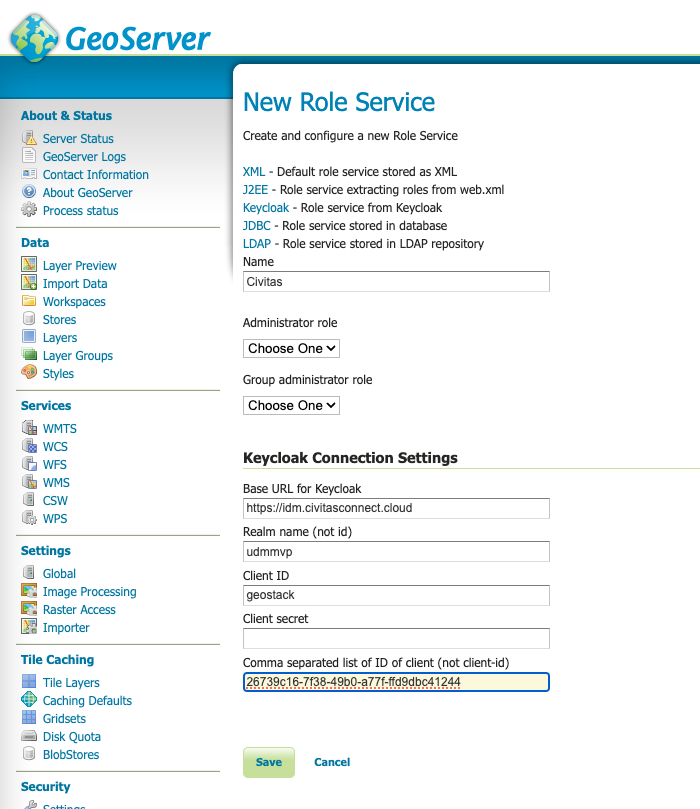
For the CIVITAS/CORE Platform, use the IDM Client named "geostack" to connect.
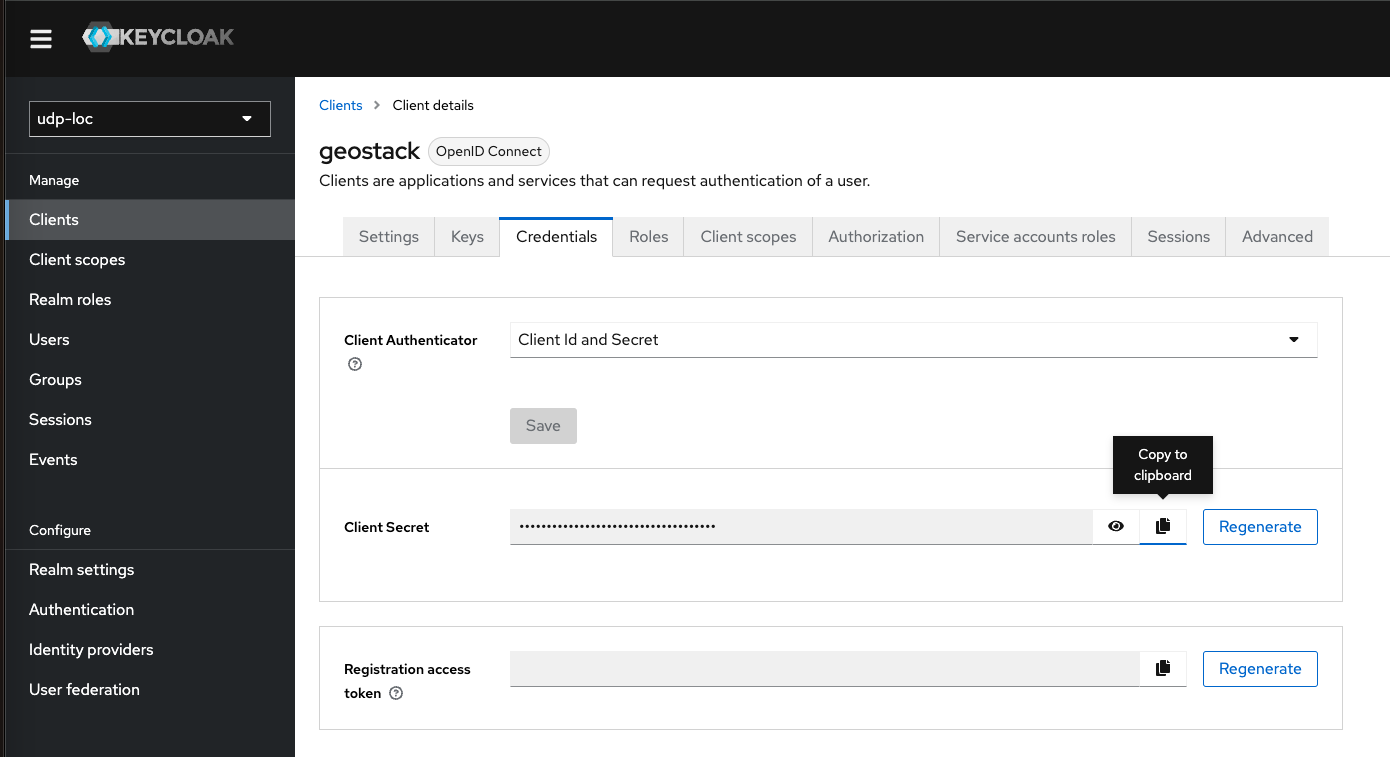
You can get the needed creation from the IDM by navigating to the Credentials Tab of the Client "geostack" in the created realm of your platform.
Use the copy Button for the Secret field to copy the credential.
If you want to load client roles additionally to realm roles, you have to specify the ID of the clients (a GUID value) as a comma-separated list in the last field. You can get this ID for each client easily after opening the client and taking the ID from the URL of the IDM page.
To get this running, you have to activate the service account roles on the settings tab of the "geostack" client.
After that switch to the "Service Account Roles"-Tab and add the role "realm-management" - "realm-admin" for the client. To do this, click on the 'Assign Role' button. To find the role in the Assign menu, change the filter in the top left to 'Filter by clients'.
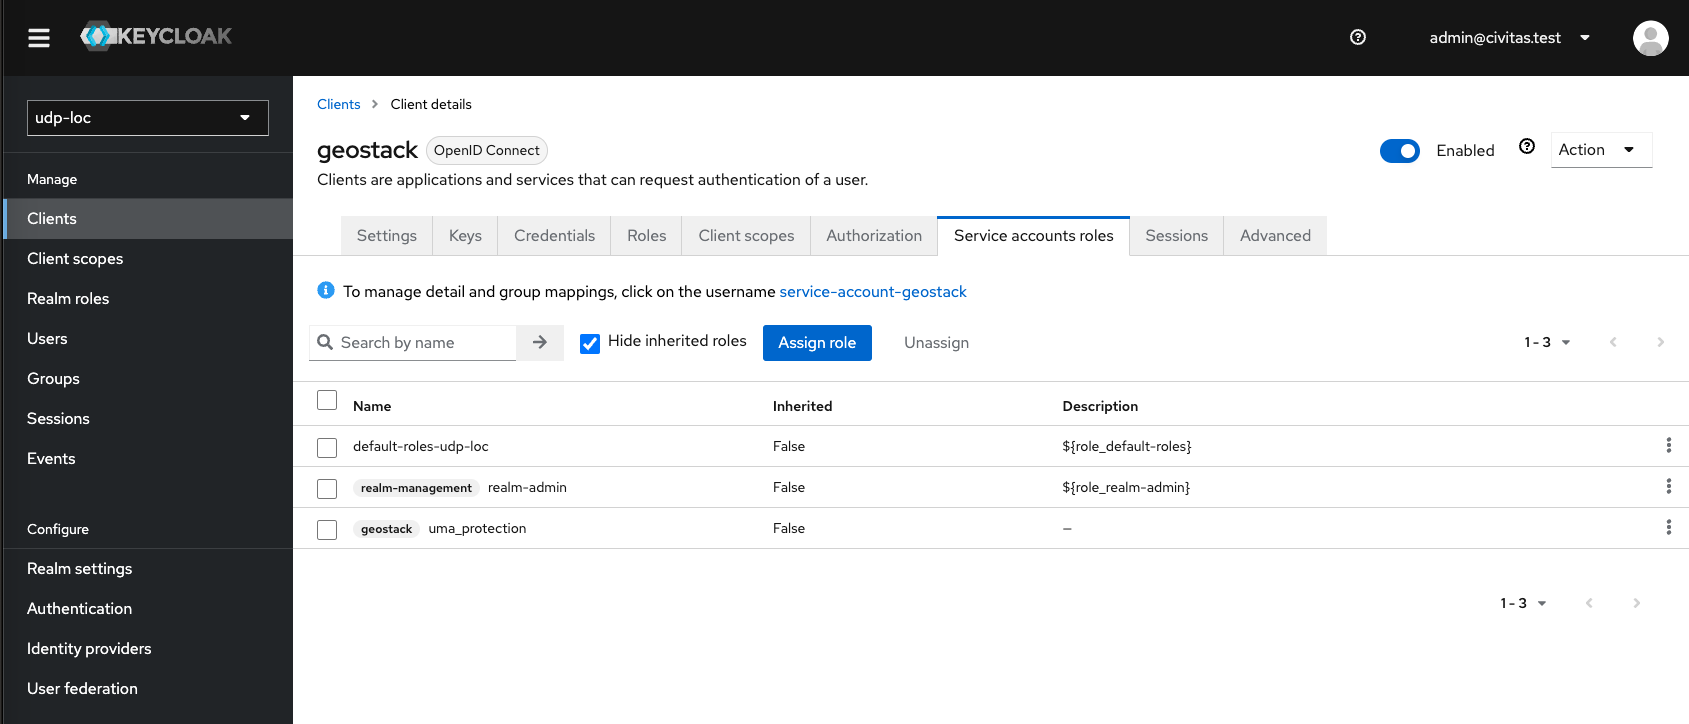
For details you can check the original documentation.
If all worked, you find after saving the roles created in Keycloak in the role tab
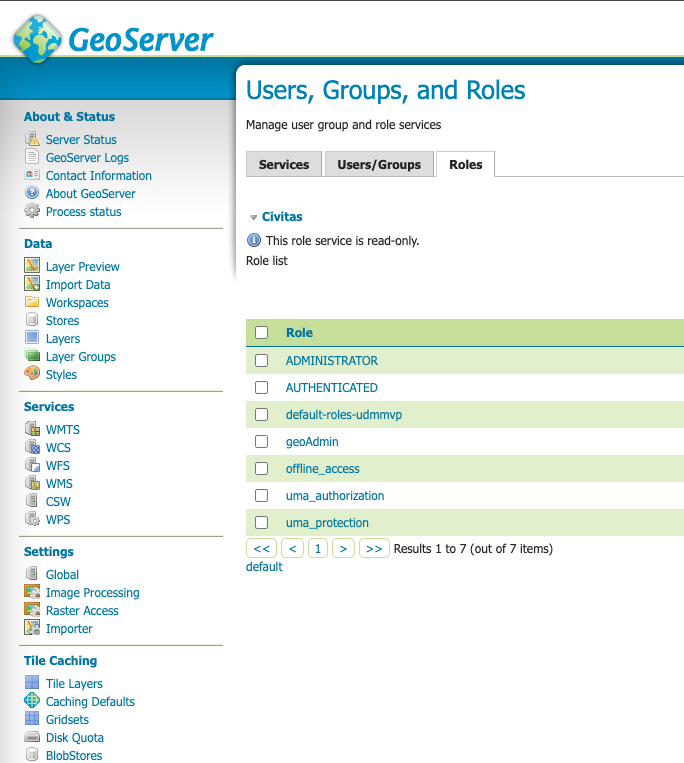
Update role service again
After the sync worked once, you can set the two fields "Administrator role" and "Group role" to your desired role for your platform. Users with this role in the IDM are handled as GeoServer-Admins. You can either create an extra role in Keycloak for this (as in the example image below) or use the existing geoAdmin role.
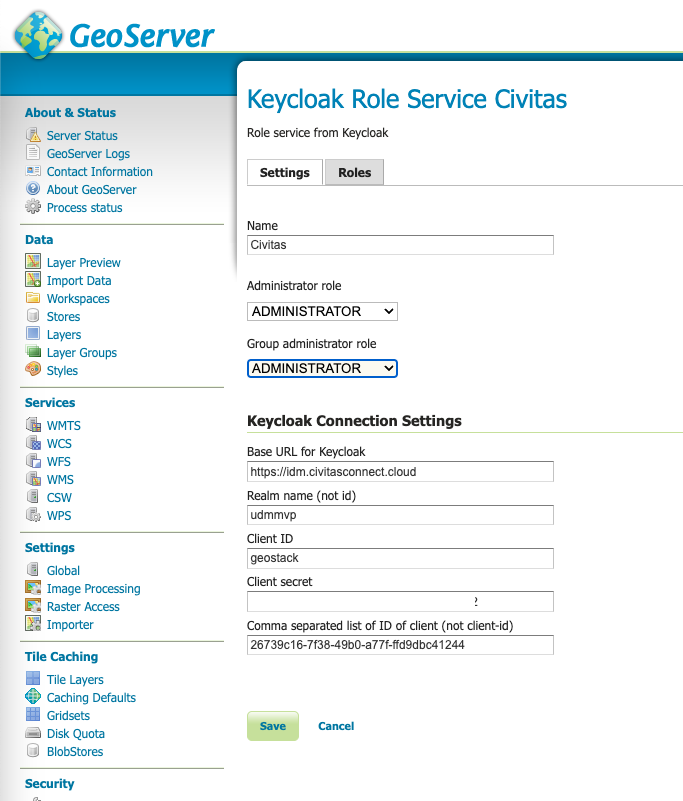
Configure a new Auth Header
Now we have to create a new Authorization header entry. Go to "Security" - "Authentication". Below the Headline "Authorization filters" click on "Add new".
The following form will come up. Choose the entry "HTTP Header". Now enter "udsp-user" in both input fields.
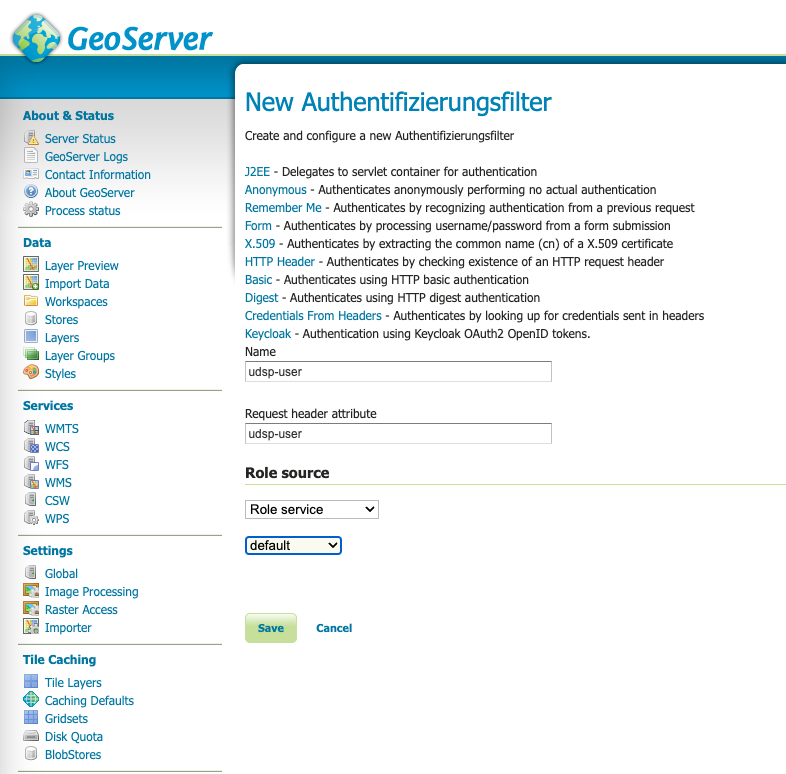
As role source choose the just created role service for "Keycloak".
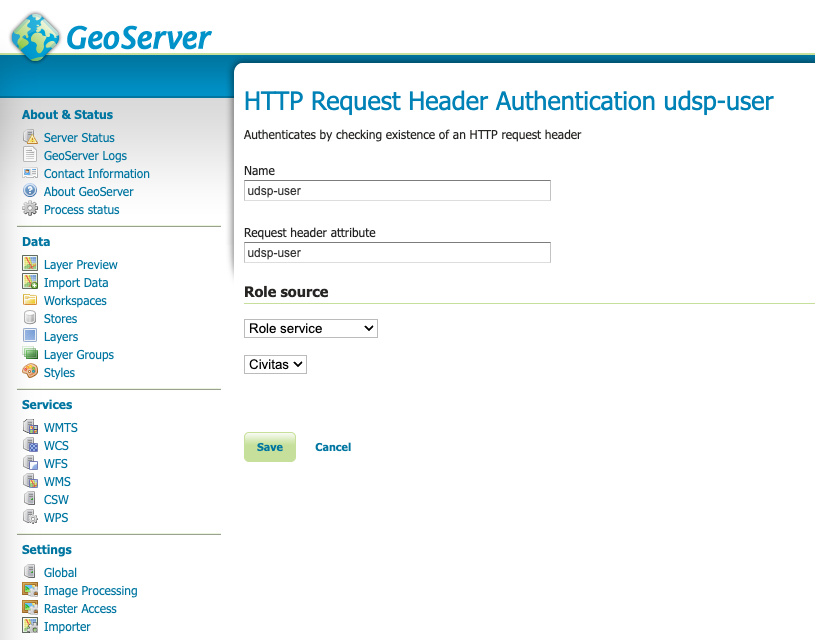
Save the new entry.
Keycloak Auth Service
Next we have to configure the Keycloak Authentication Filter.
Go to "Security" - "Authentication". Below the Headline "Authorization filters" click on "Add new".
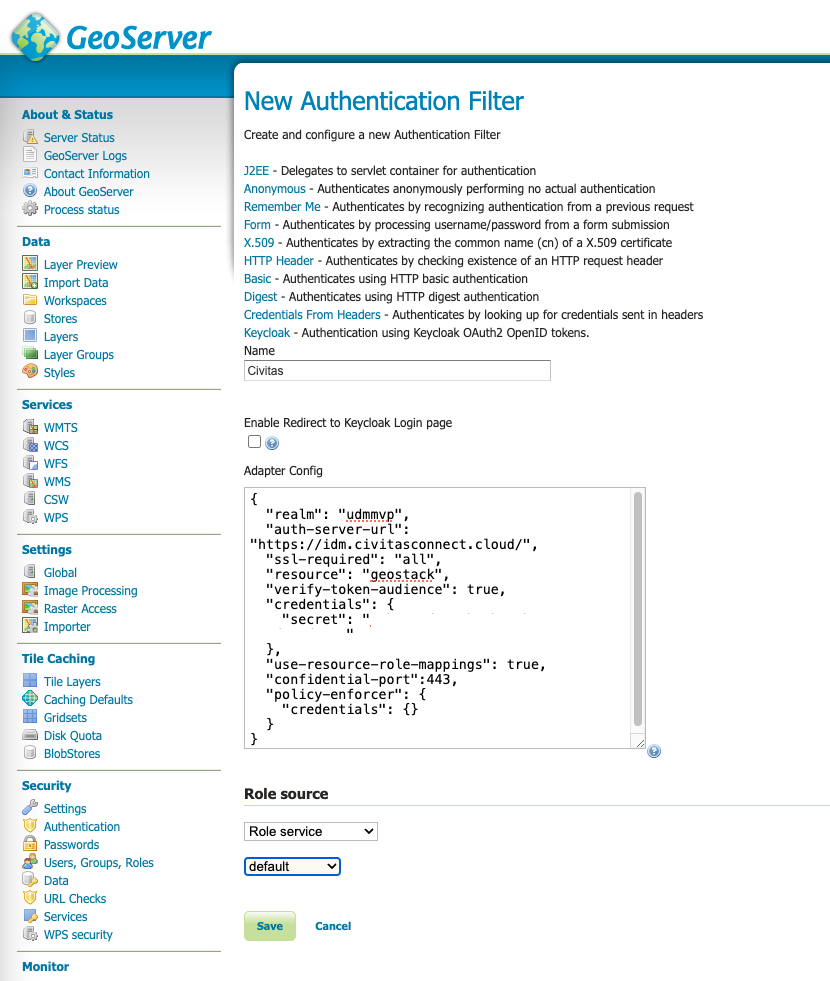
The following form will come up. Choose the entry "Keycloak".
Define a name for the new service.
The JSON content needed for the configuration field can be obtained directly in the IDM. Open the Client "geostack" in the IDM and use the button in the upper right called "Action", then the entry "Download adapter config".
The following popup is shown.
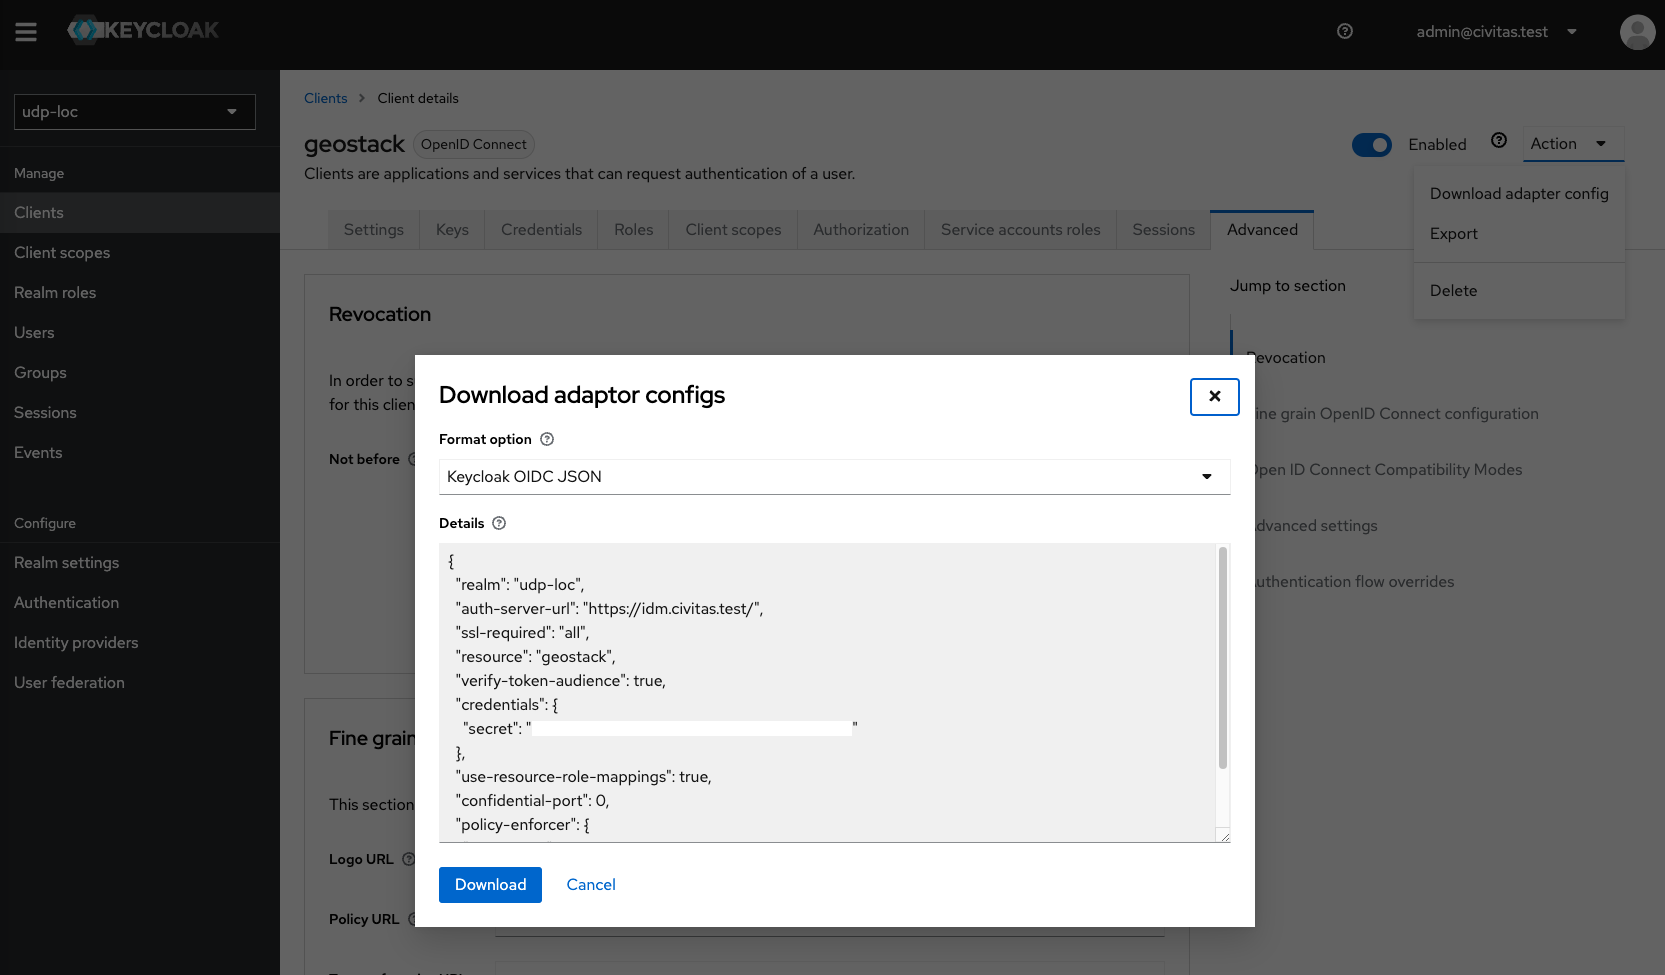
You can copy the entire json to the GeoServer field. Update the confidential port setting to "443".
As role source "Role service" should be selected and the the just created role service for Keycloak named e.g. "Civitas".
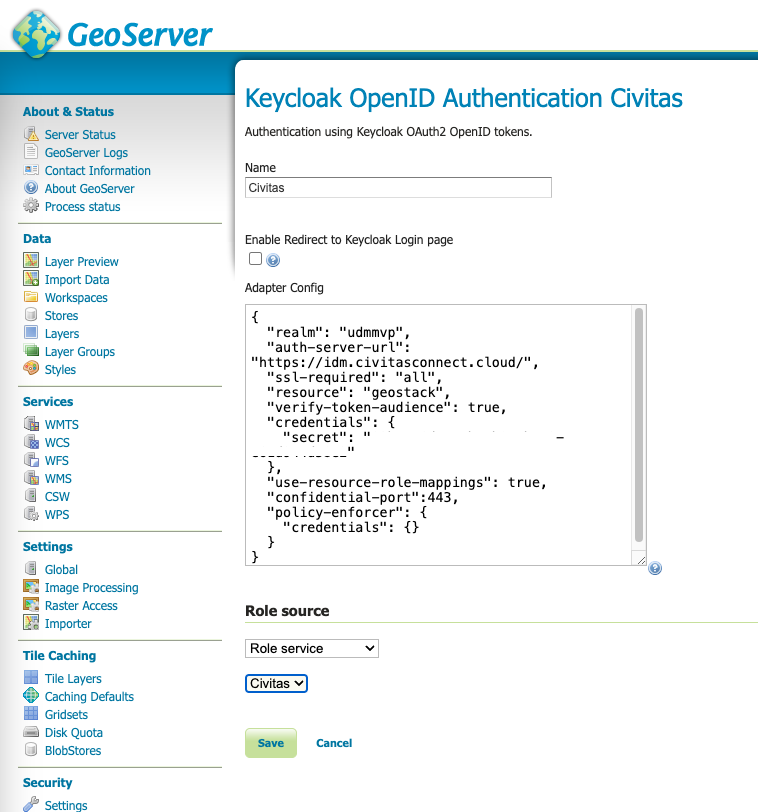
Save the new entry.
Add both filters to the following auth chains
Finally we have to add the new filters to the following filter chains.
Needed filter chains
- web
- rest
- gwc
- default
Both new filters must be placed to the top of the list. Place the udsp-user filter first, followed by the Keycloak filter.
At the end, do not forget to save on the Authorization page itself - the filter configuration does not save with the Close buttons.
Conclusion
Now you can login with IDM users.