Connect external data
Role: Data Architect, Data Steward
You need to collaborate with: Data Owner, Data Gatekeeper
Goal: You want to connect an external Data source to the Platform and make it available for further processing.
Required Permissions: create Data structure, read Data structure, release Data structure, create Data source, read Data source, release Data source
What you will achieve
After completing this guide, you will have:
- Created a Data structure
- Connected a Data source
- Linked the Data source to the Data structure
- Managed access permissions
- Made the Data source available for pipelines
Your collaborators
This process includes a handover between roles:
- A Data Architect or Data Steward prepares the Data structures and Data sources
- A Data Owner or Data Gatekeeper must review and release them
→ You cannot complete this guide alone if you do not have release permissions.
Before you start
- Verify that you can create Data structures and Data sources. If these options are unavailable, contact your Tenant Admin to request access.
- Identify a Data Owner or Data Gatekeeper who can authorize the release of your Data-related elements.
Understanding your source data
Before connecting a Data source, make sure you understand the structure and meaning of your source data. In CIVITAS/CORE, a Data source always must comply with a Data structure.
This means:
- the data of the Data source must match a defined structure definition
- relationships between entities must be clear
- data fields must be mapped consistently
In this guide, we demonstrate this process using a use case which collects energy usage data from Smart Meters ("TAF10 data") as an example. It shows how to ingest sensor data and store it as Observations in a SensorThings API backend.
→ You will find additional context from the Smart Meter energy use case in the highlighted boxes throughout this guide.
Requirements
Two types of data are required:
- Master data → defines devices, sensors, and datastreams
- Measurement data → continuous sensor values received via MQTT
Make sure you have access to
- a PostgreSQL database (master data)
- a MQTT broker (measurement data)
Before measurement data can be processed, the master data must be made available.
→ In this guide, you will connect both Data sources required for this setup.
Step-by-step guide
Step 1: Create a Data structure
- Go to Data structures
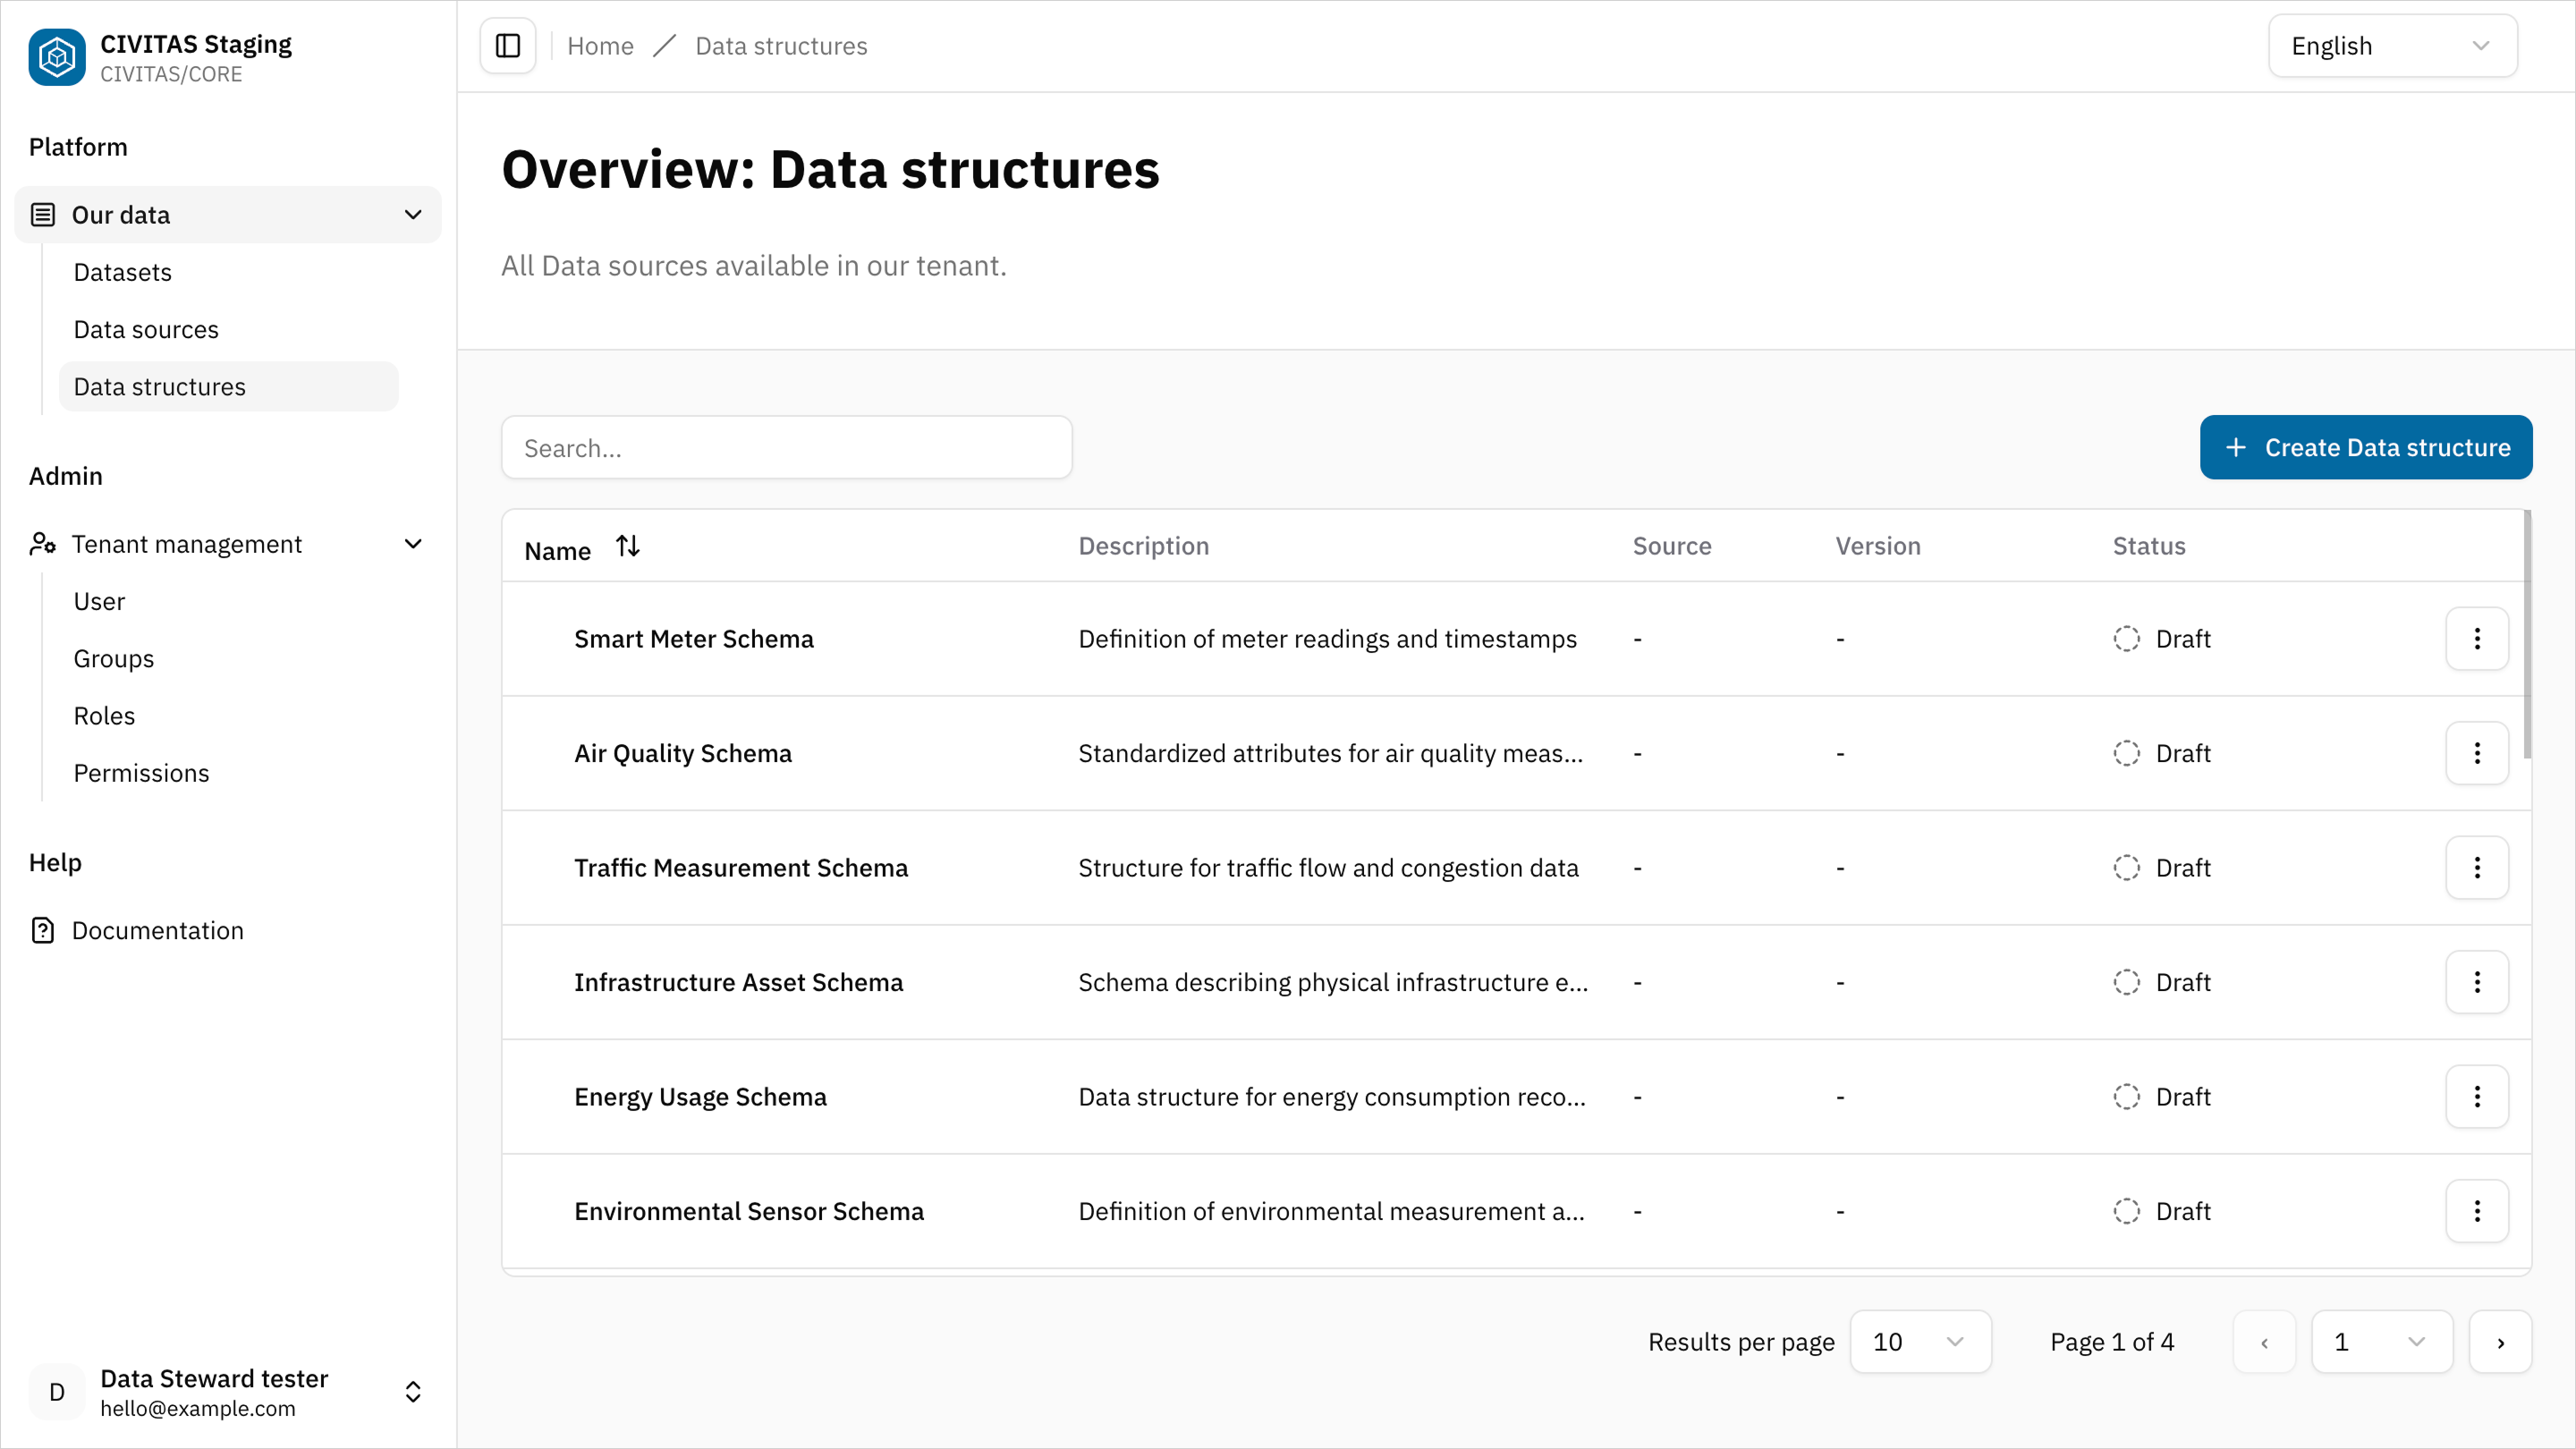
- Click Create Data structure
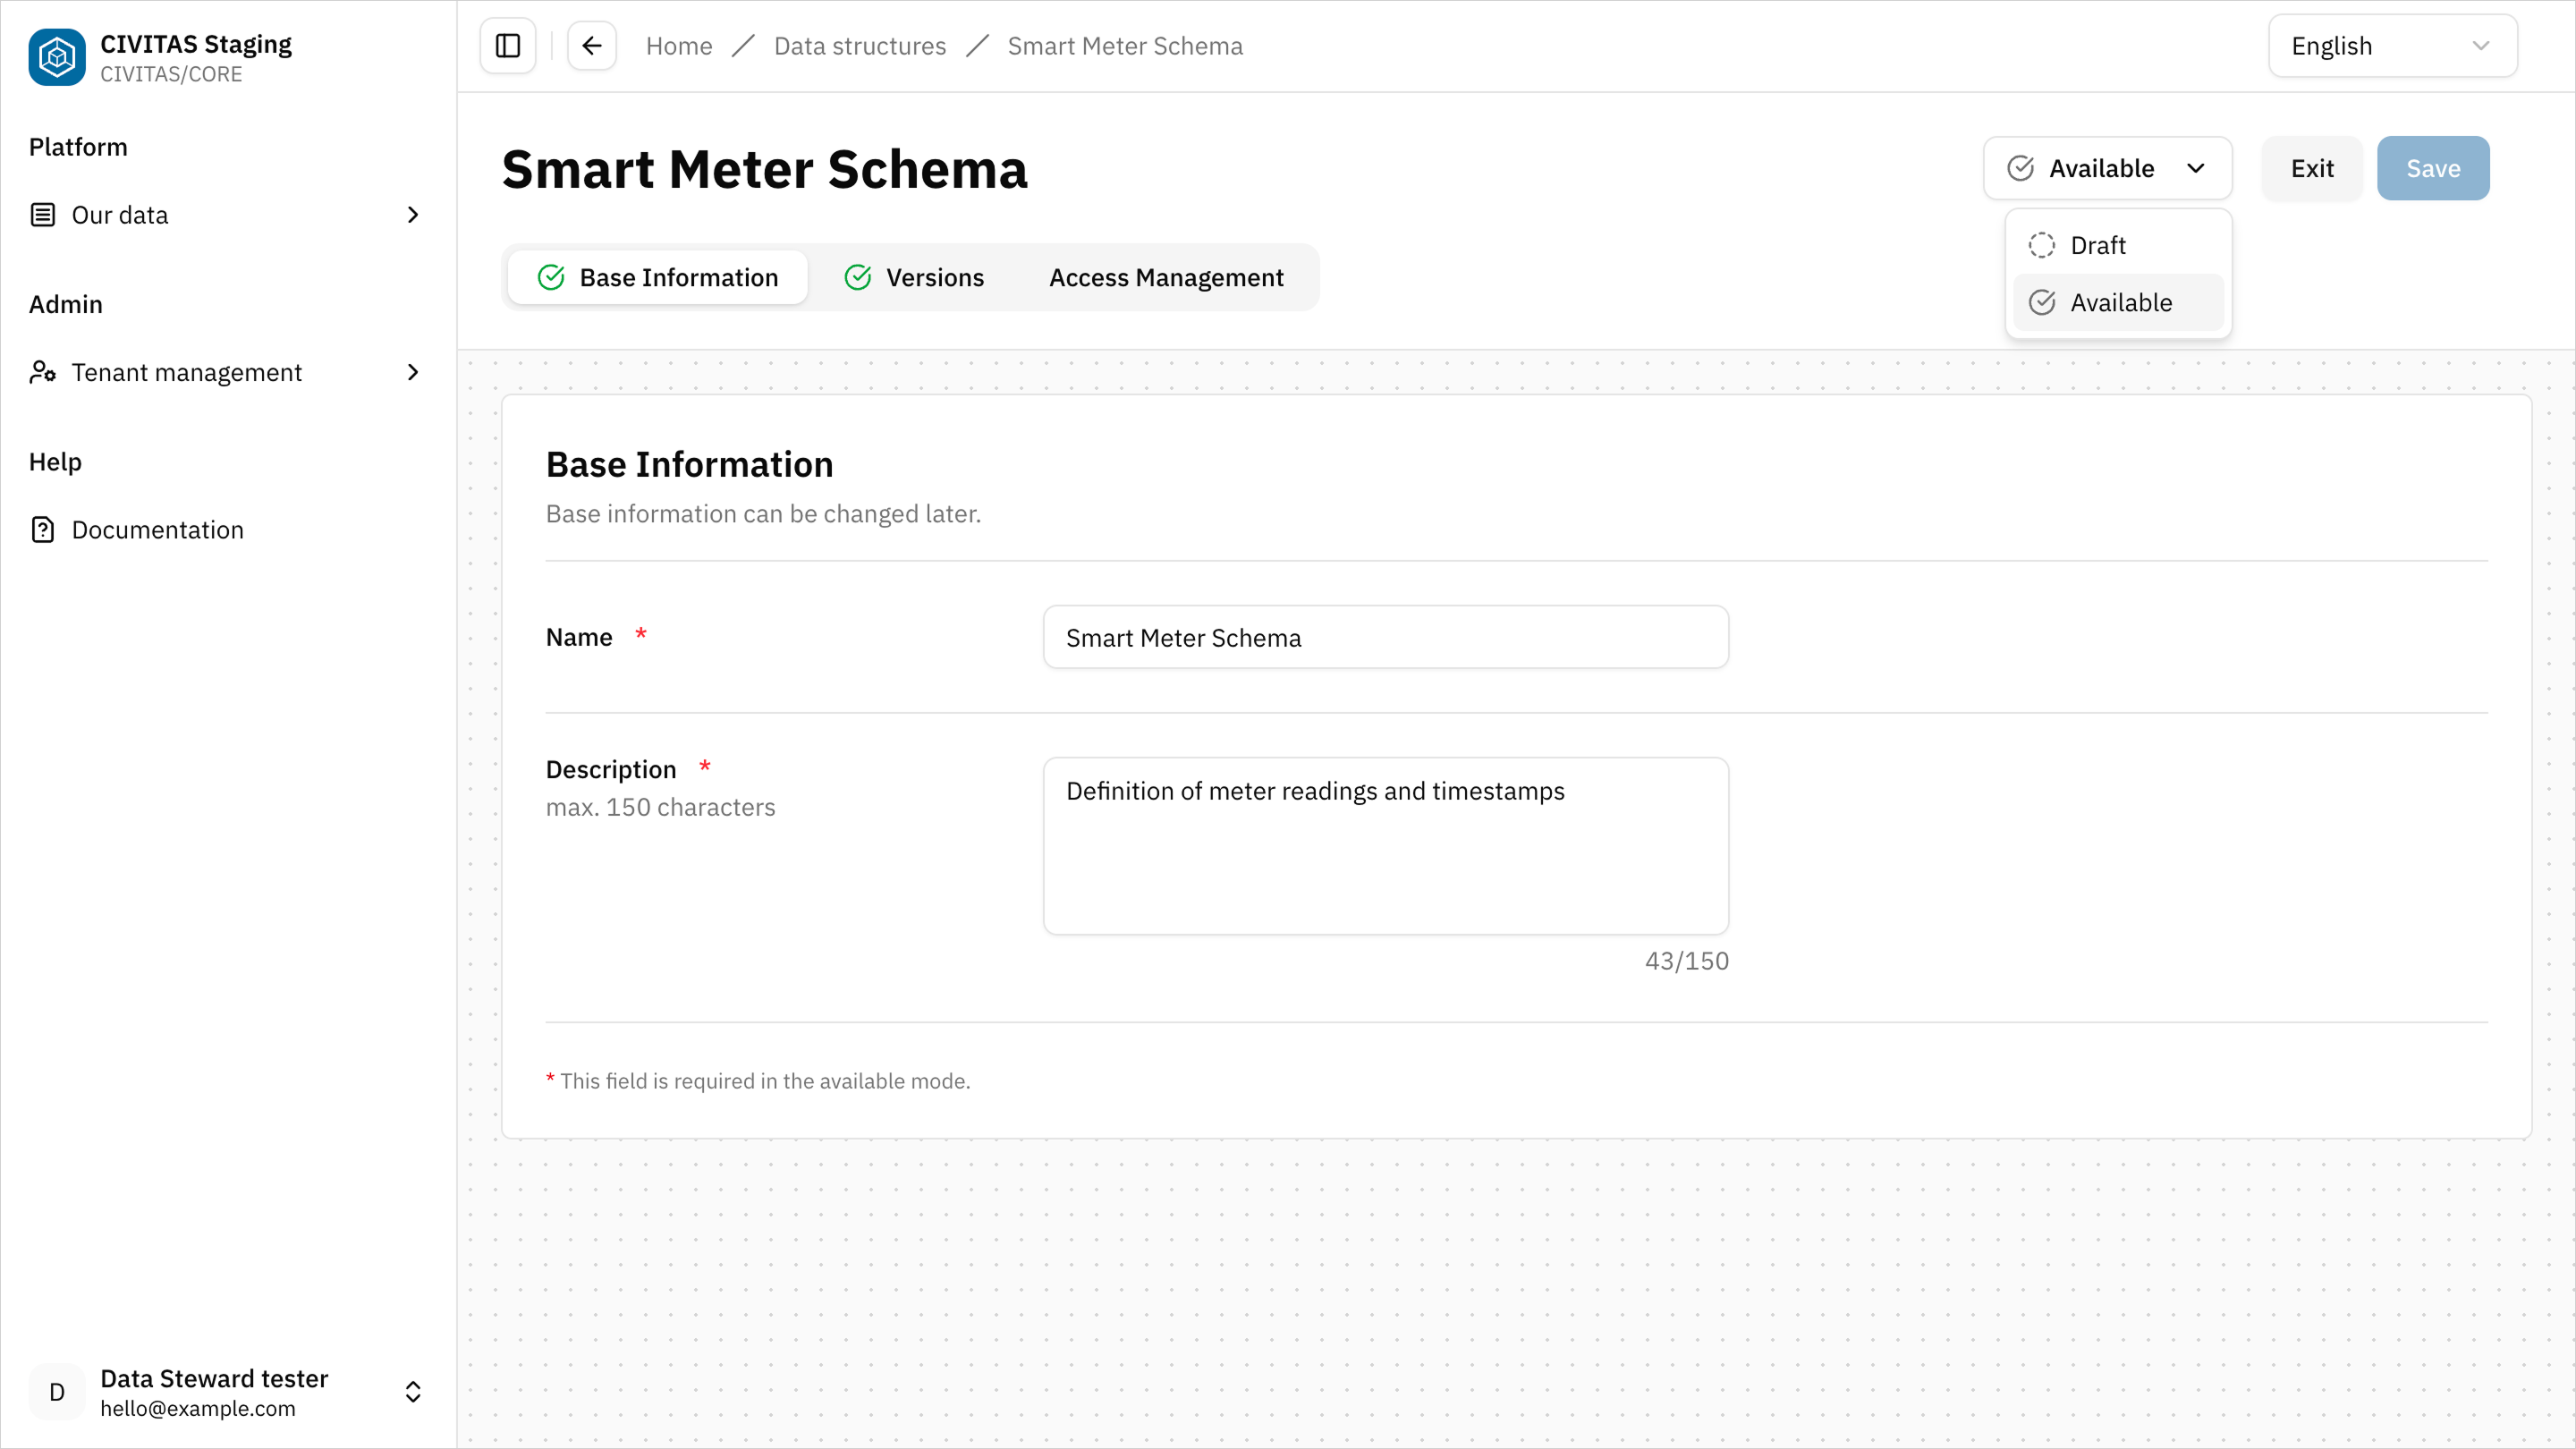
- Enter Name and hit Create and continue
- Add Base information in the 1st tab and hit Save
Create a Data structure for the master data required to model devices and their energy usage datastreams.
Example base information:
- Name: Smart Meter Energy master data
- Description: Smart meter device and energy datastream structure
Step 2: Define the Data structure
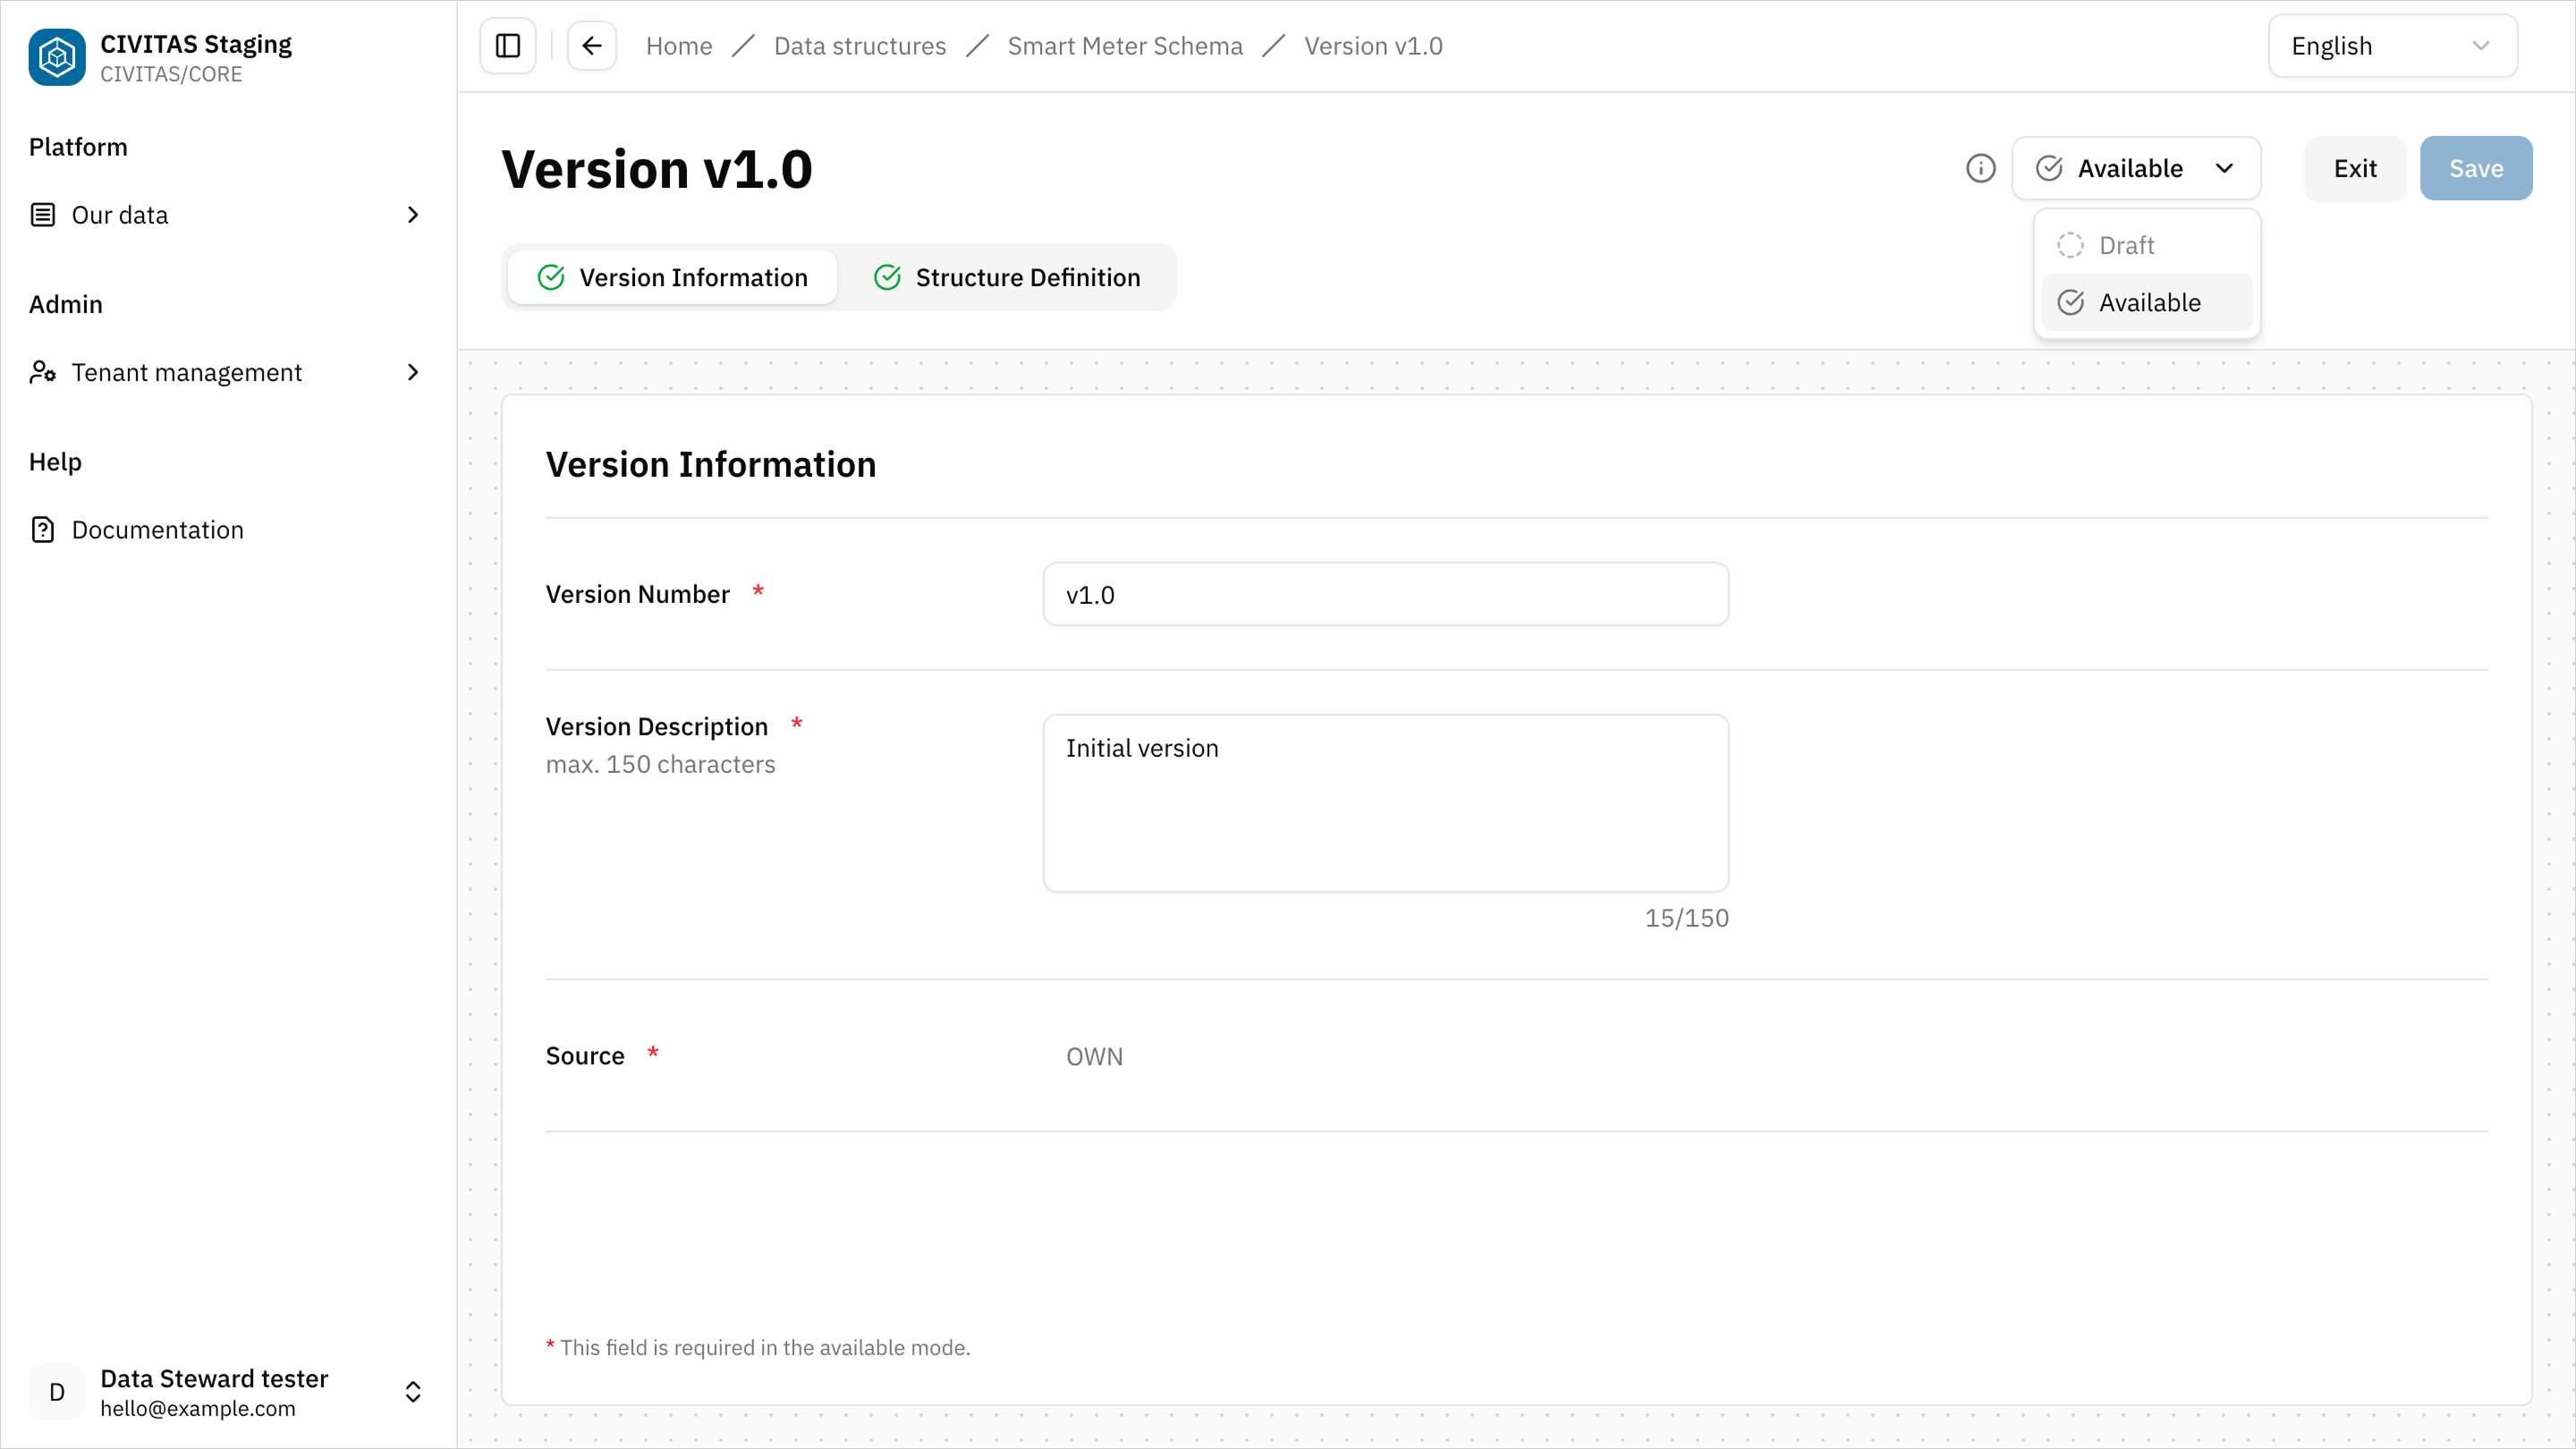
→ In CIVITAS/CORE, a Data structure is versioned. Each version represents a specific structure definition.
- Create a new version in tab Versions
- Enter Version Number and Description
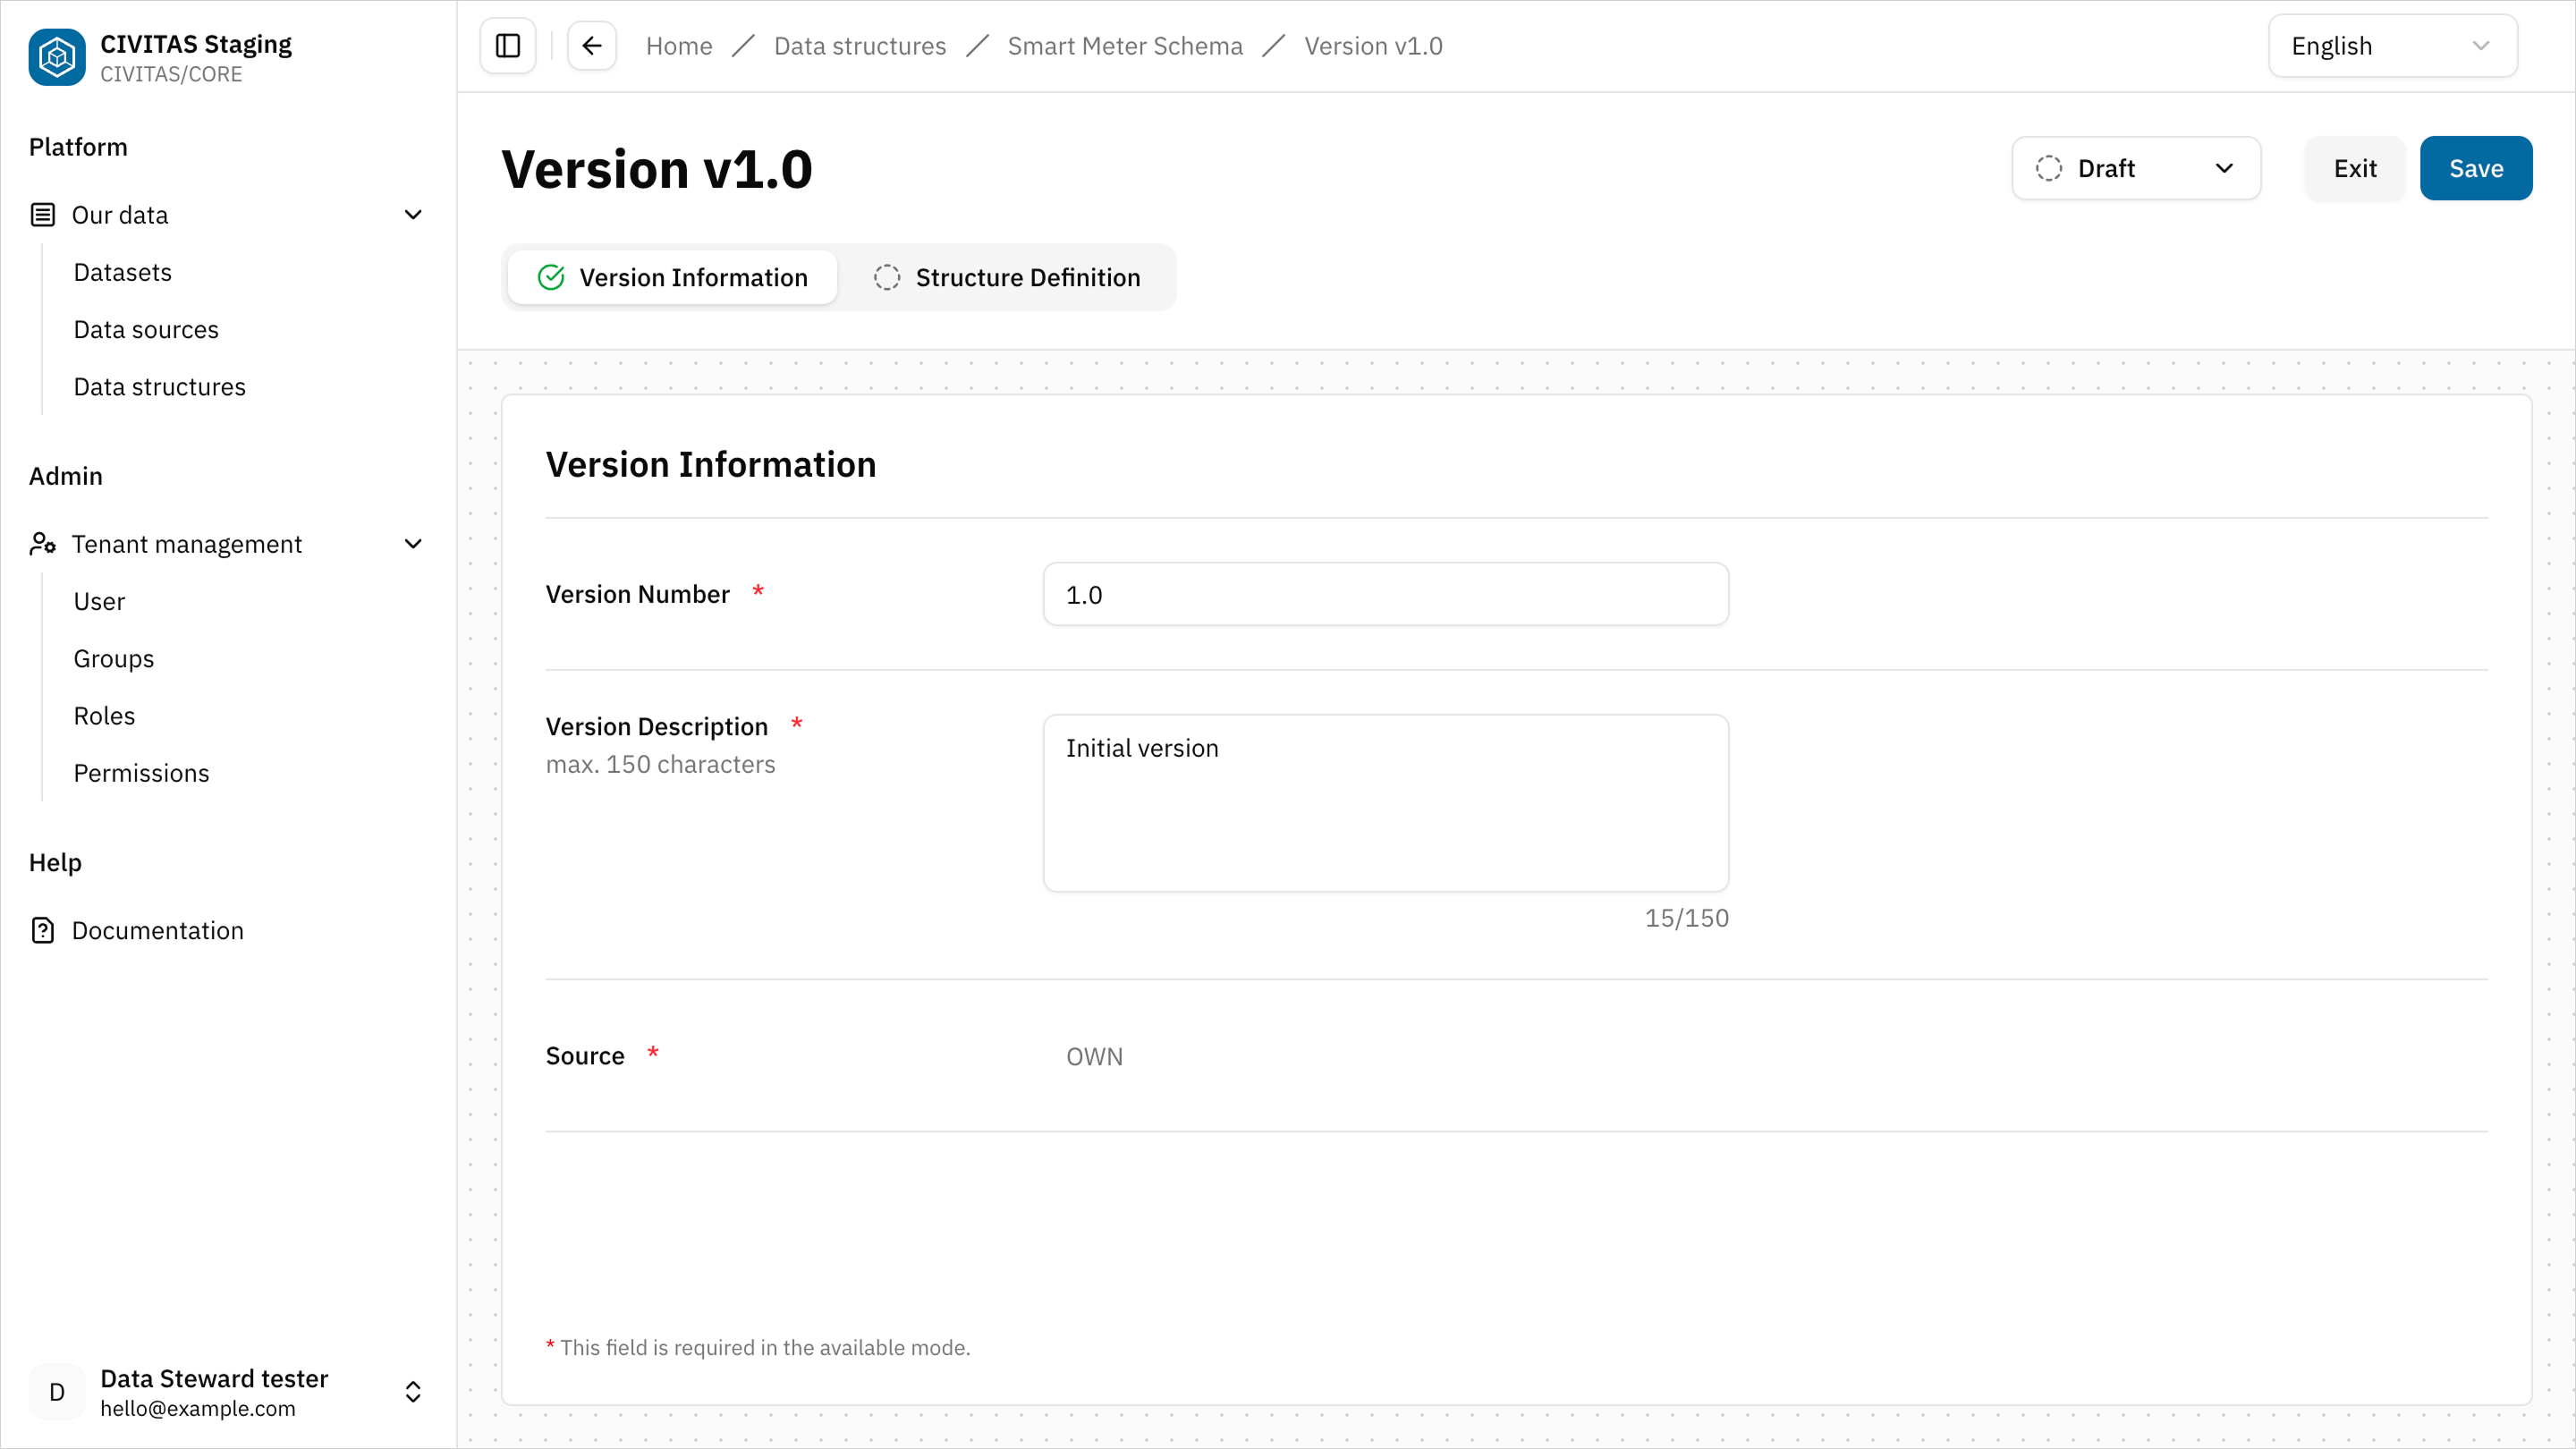
- Open the UML editor in tab Structure Definition
- Model your structure and hit Save
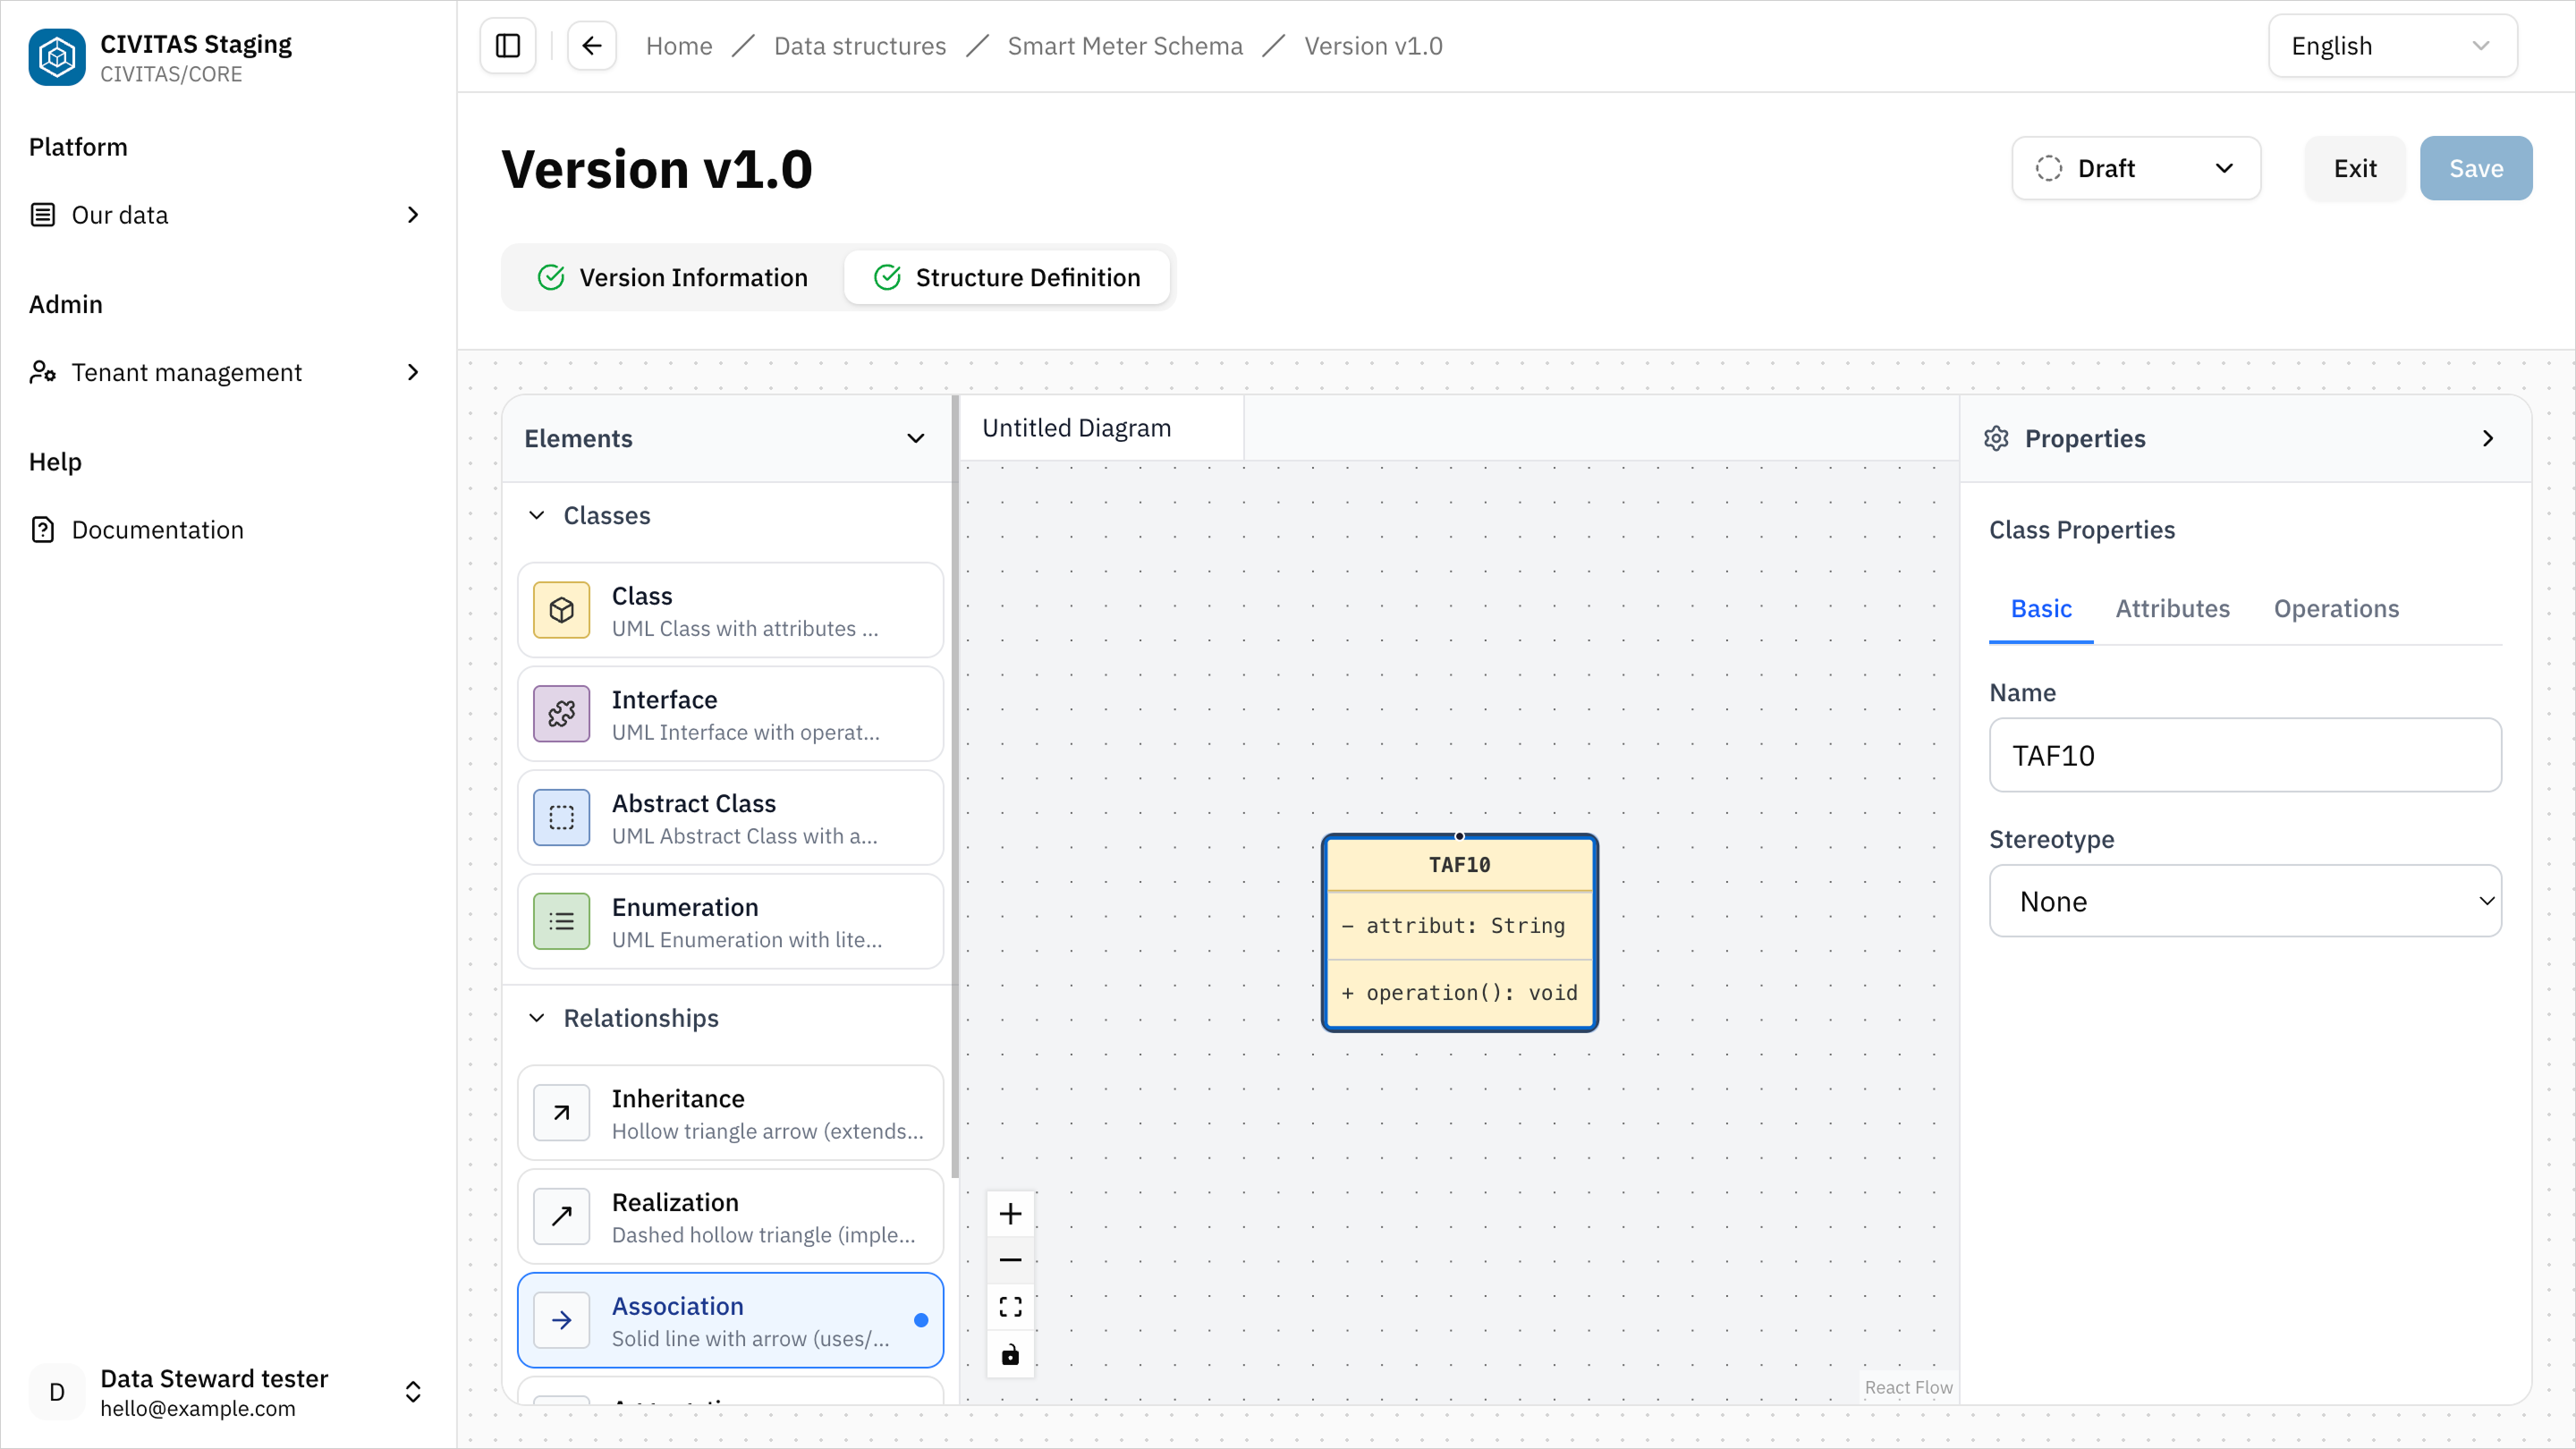
The following entities must be created and can be freely defined:
- Things
- Sensors
- Observed Properties
- Datastreams
This structure will later be used to interpret master data from the PostgreSQL Data source.
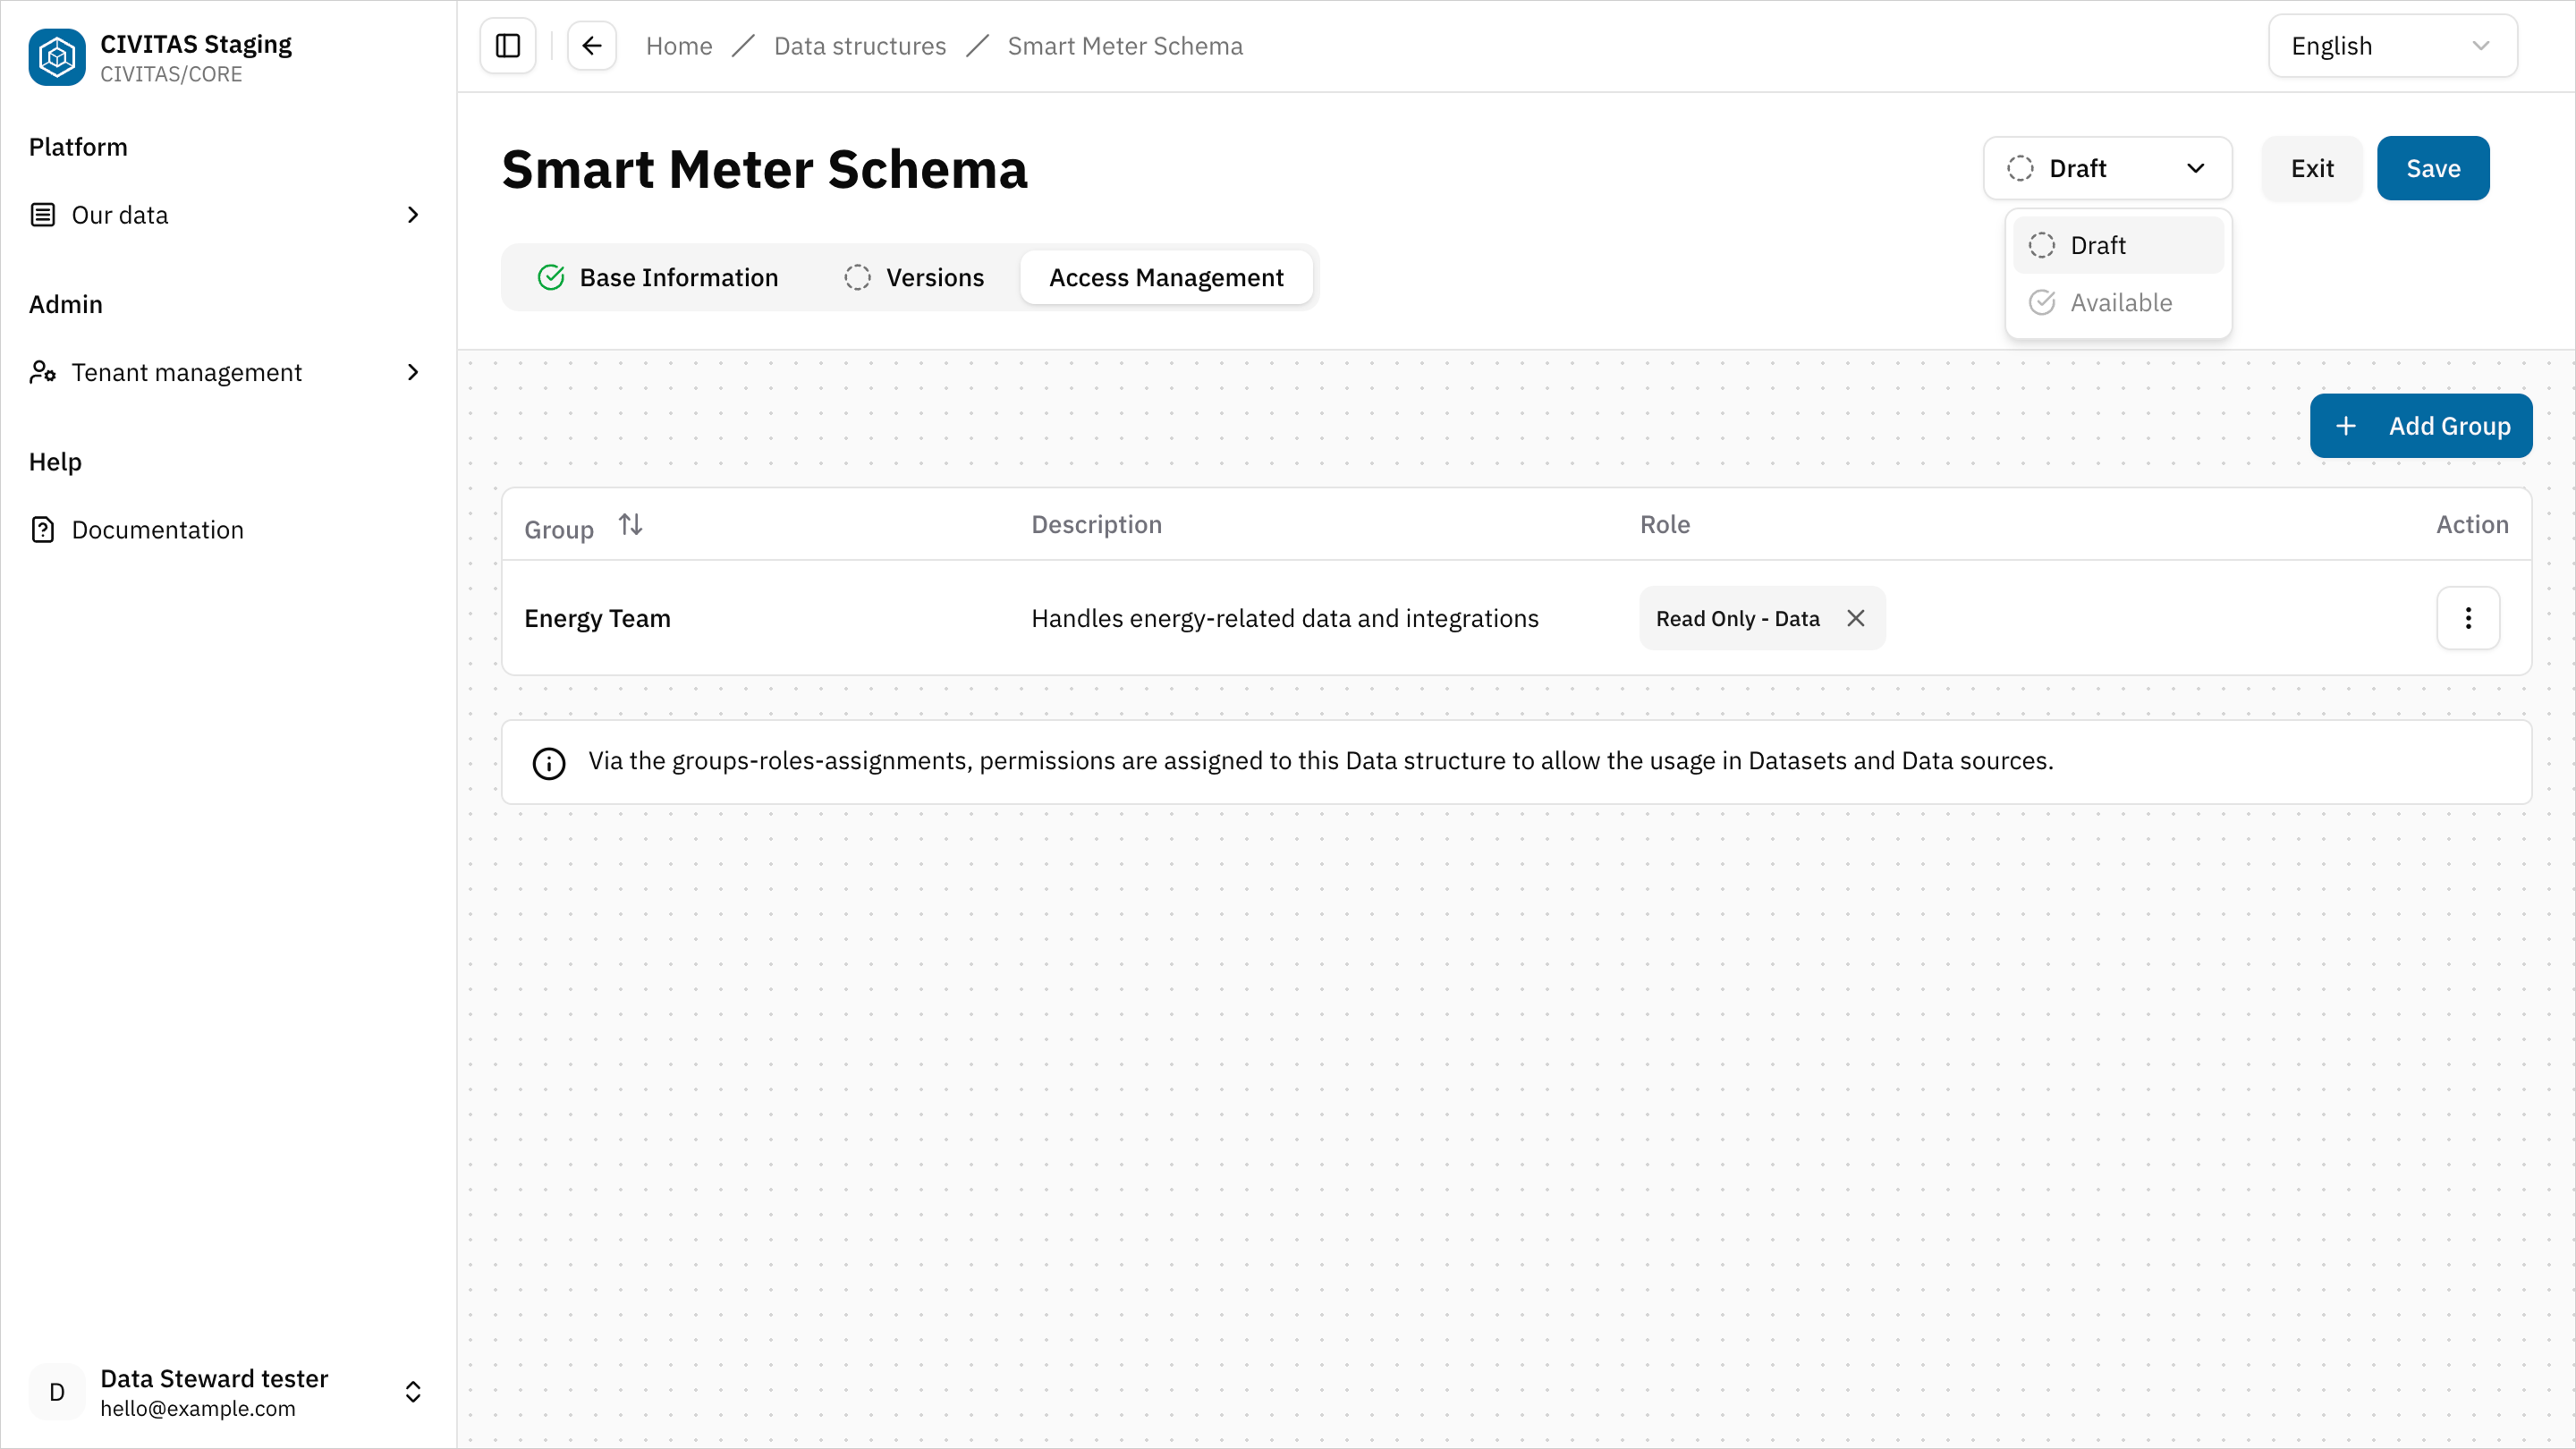
Step 3: Manage access permissions
- Open the Access Management tab
- Add a Group

- Assign a Role to the Group
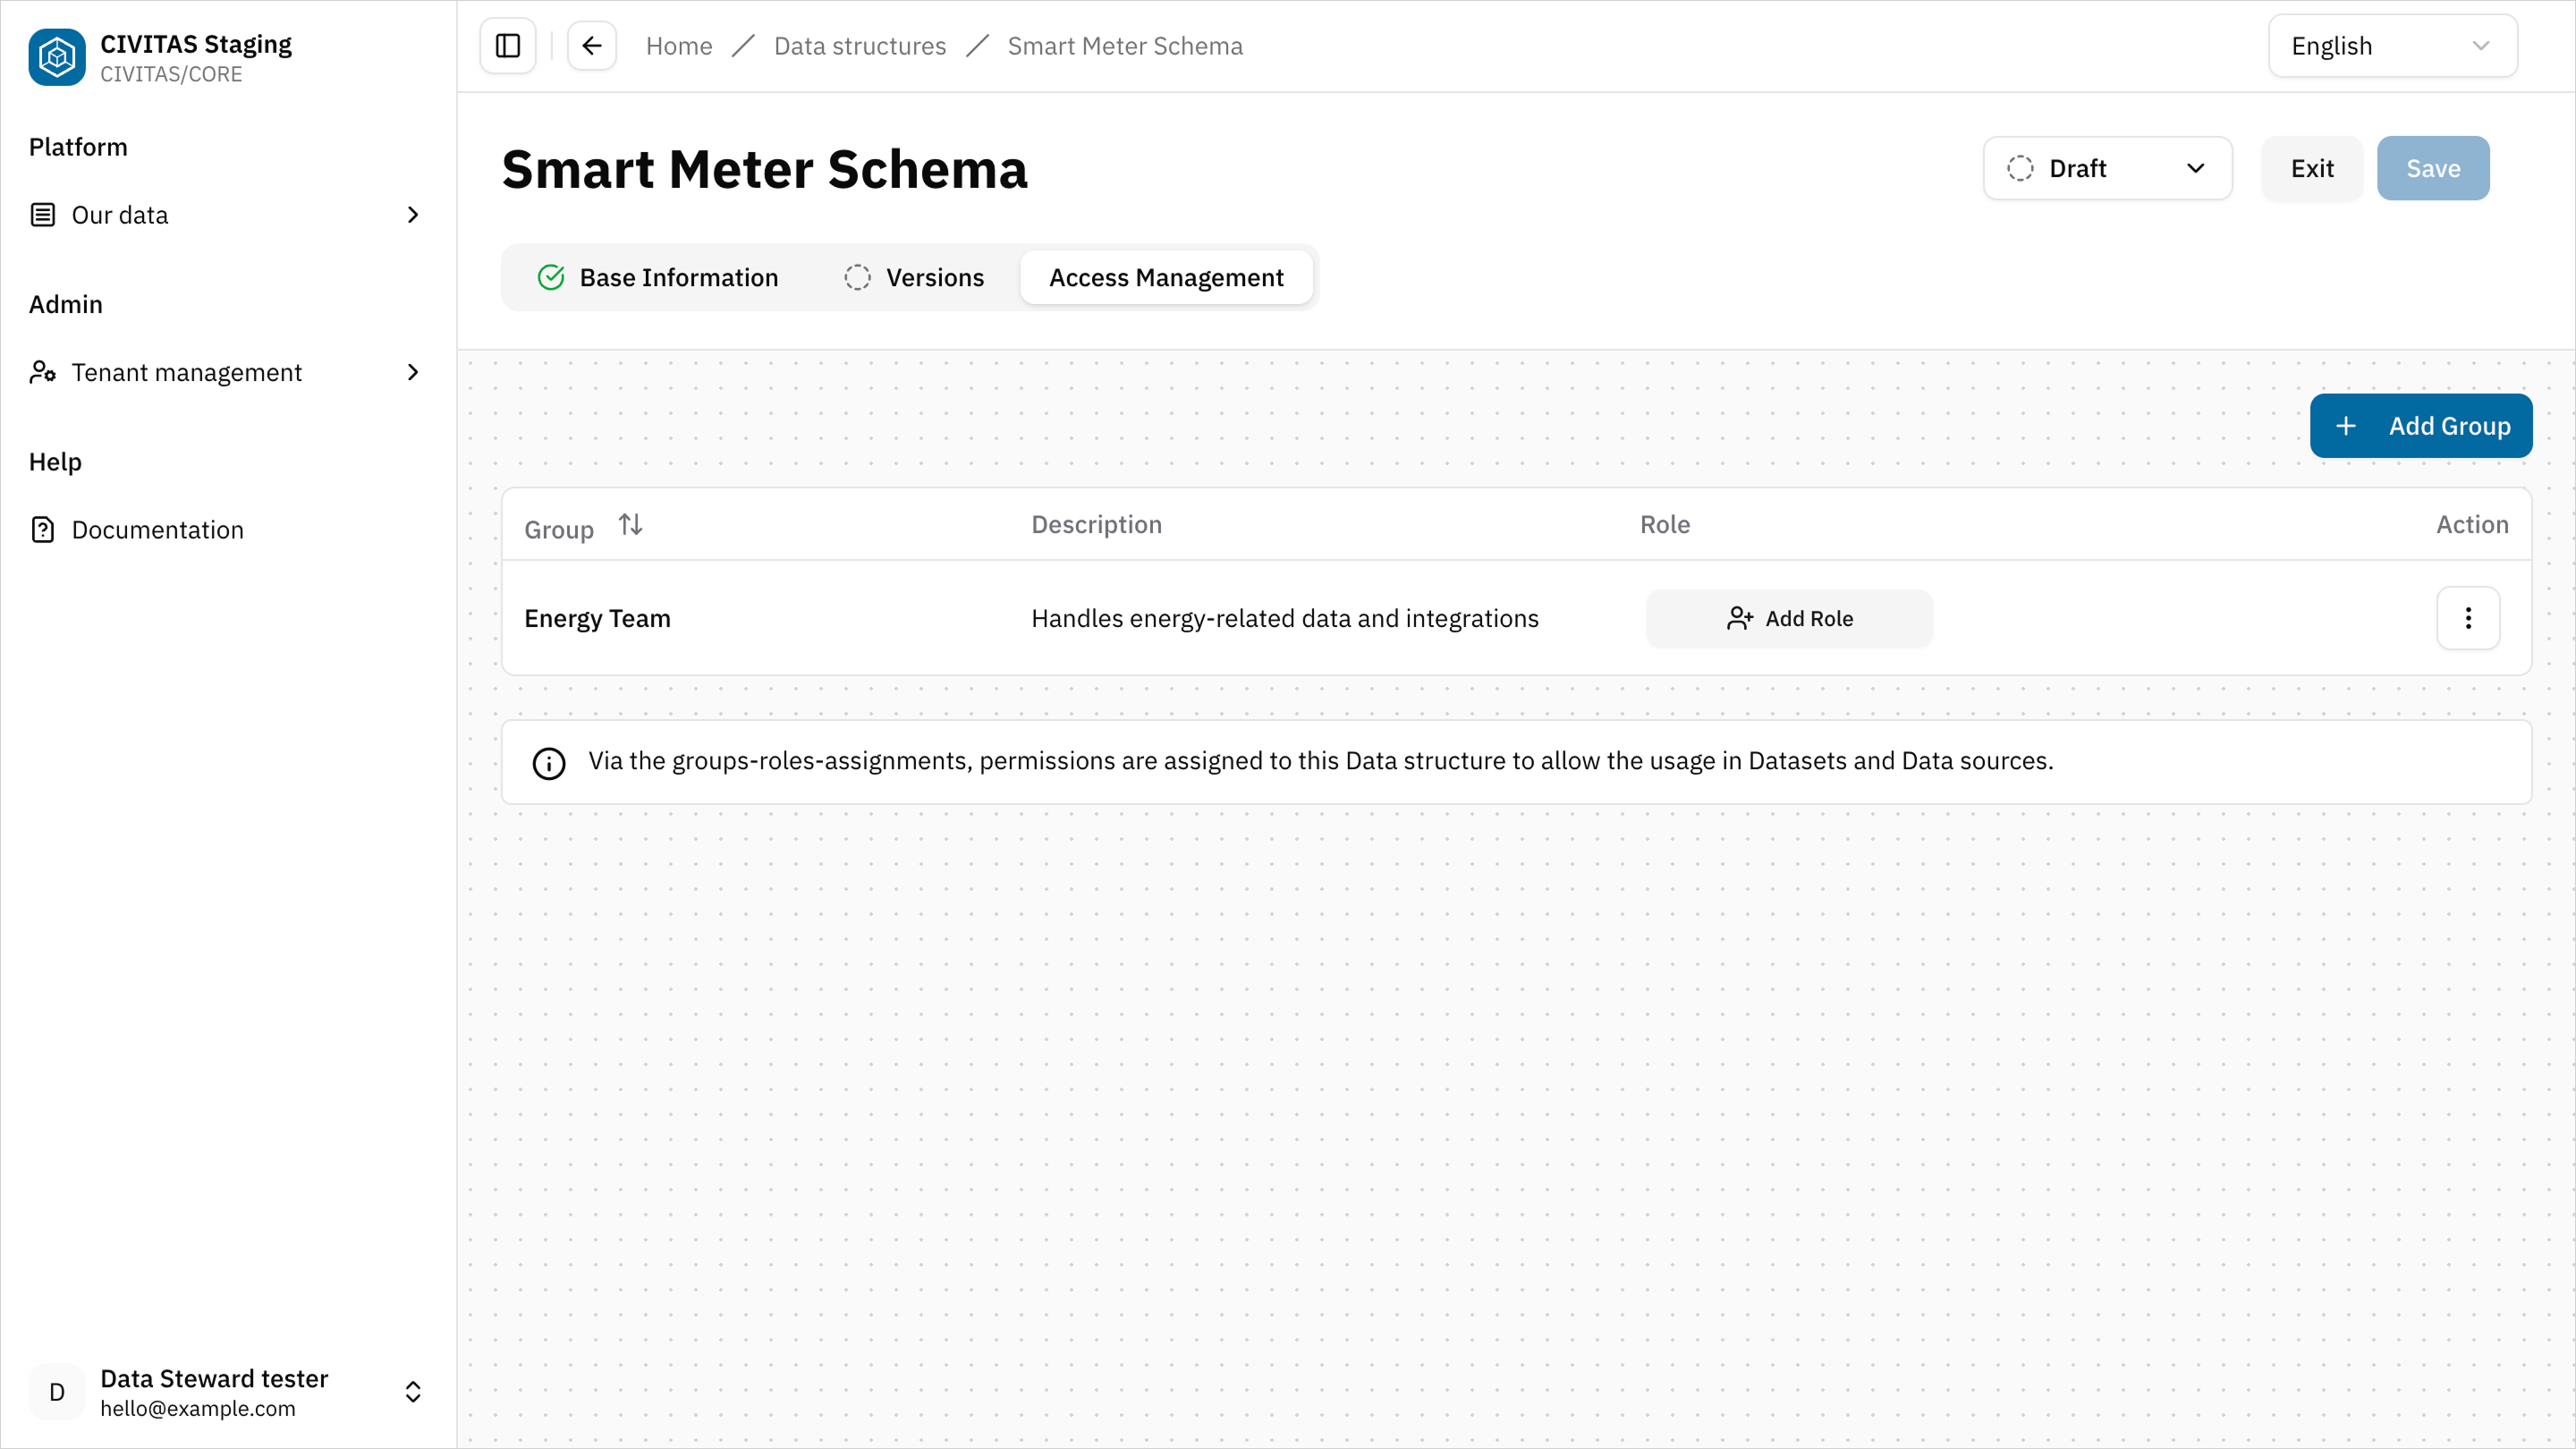
- Repeat these steps to add more Groups and Roles
- Hit Save and Exit
- Groups that have platform-wide permissions on all Data-related elements will have access to this Data structure automatically.
- Removing your own Group Role assignment may result in the loss of your permissions for this Data structure.
- Access in CIVITAS/CORE is defined by assigning a Role to a Group within a specific Scope, f.e. this Data structure. → Learn more about the authorization concept
Step 4: Request Release of the Data structure
→ The release step ensures that Data structures are reviewed before they are used in production.
You cannot make the Data structure available without release permission.
- Contact a Data Owner or Data Gatekeeper to review and release it.
You can:
- share a direct link to the Data structure
- or provide the name of the Data structure
Release the Data structure (Data Owner / Data Gatekeeper)
- Open the Data structure and review the Base information
- Open the Version and review the Structure definition and Version information
- Change the Status of the Version to Available
- Change the Status of the Data structure to Available
Outcome
The Data structure and its Version is Available and can now be used in Data sources and Pipelines
Step 5: Create a Data source
- Go to Data sources
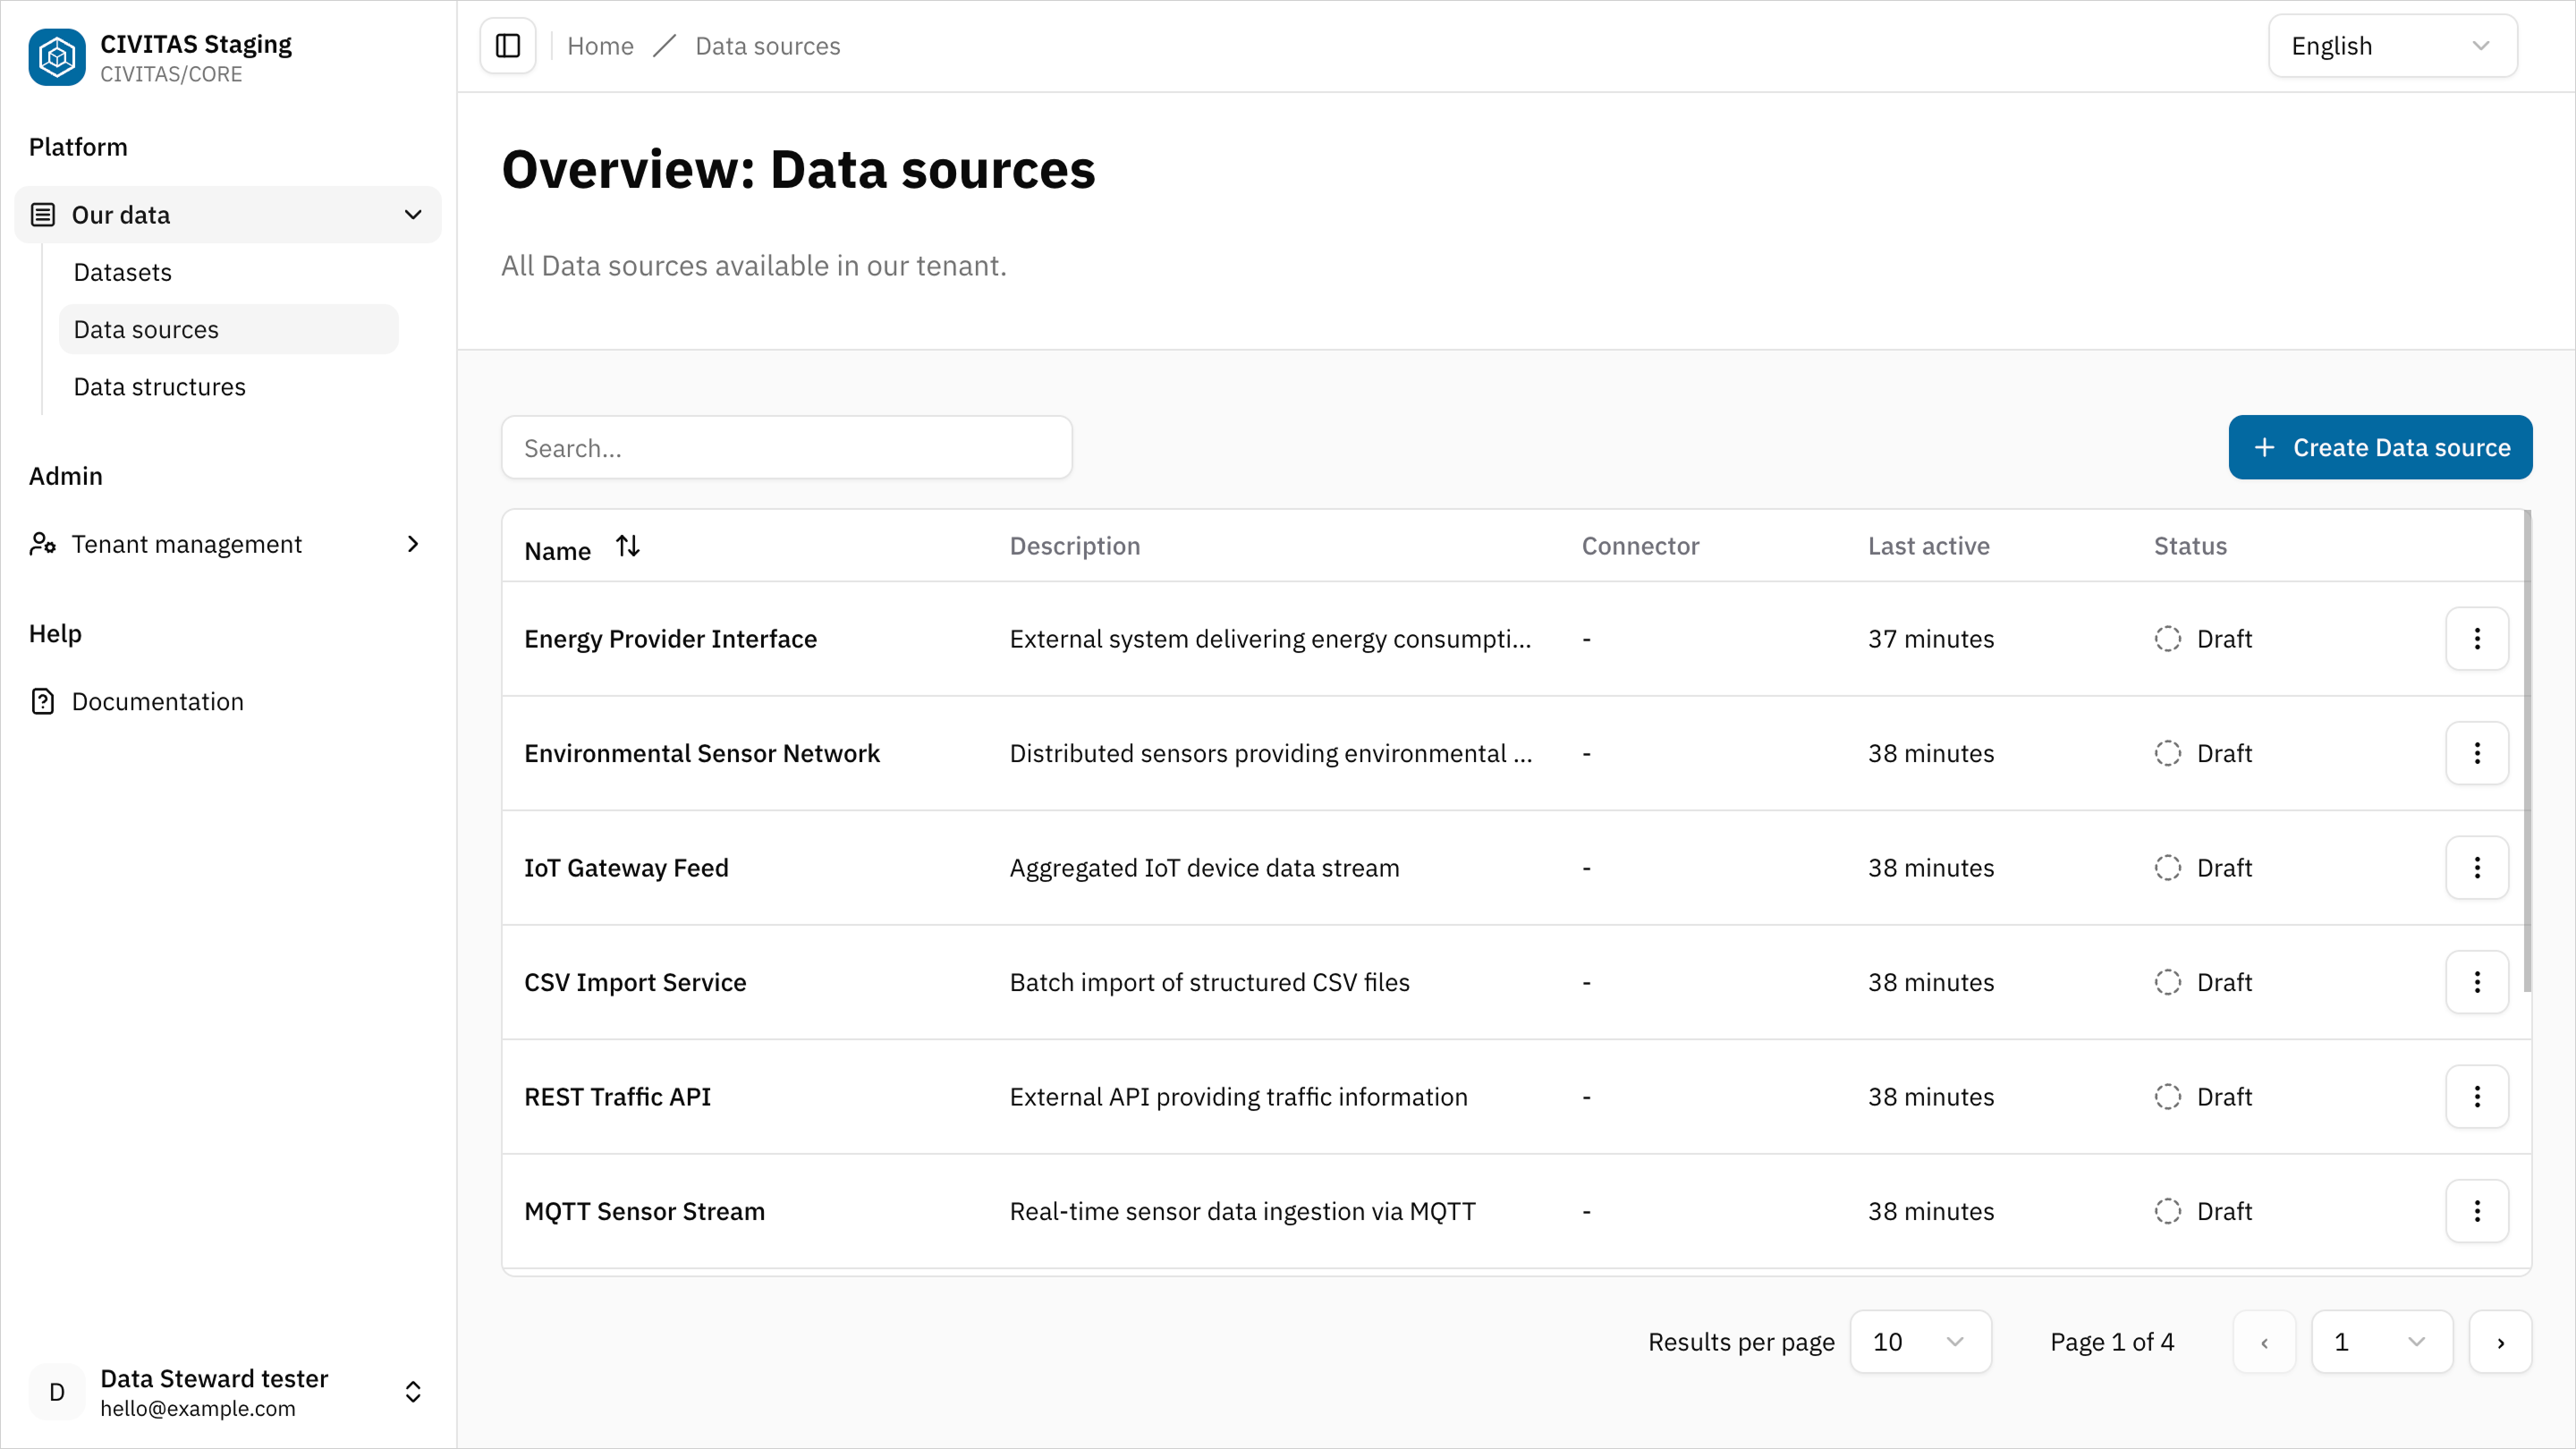
- Click Create Data source
- Enter Name and hit Create and continue
- Add Base Information in the 1st tab
For this use case start with the PostgreSQL data source. It provides the master data required before measurement data can be processed.
Example base information:
- Name: Smart Meter PostgreSQL master data
- Description: Master data source for devices and datastreams used in Smart Meter
Step 6: Configure the Connector
- Open the Connector tab
- Select a Connector type
- Enter the required Configuration details and hit Save
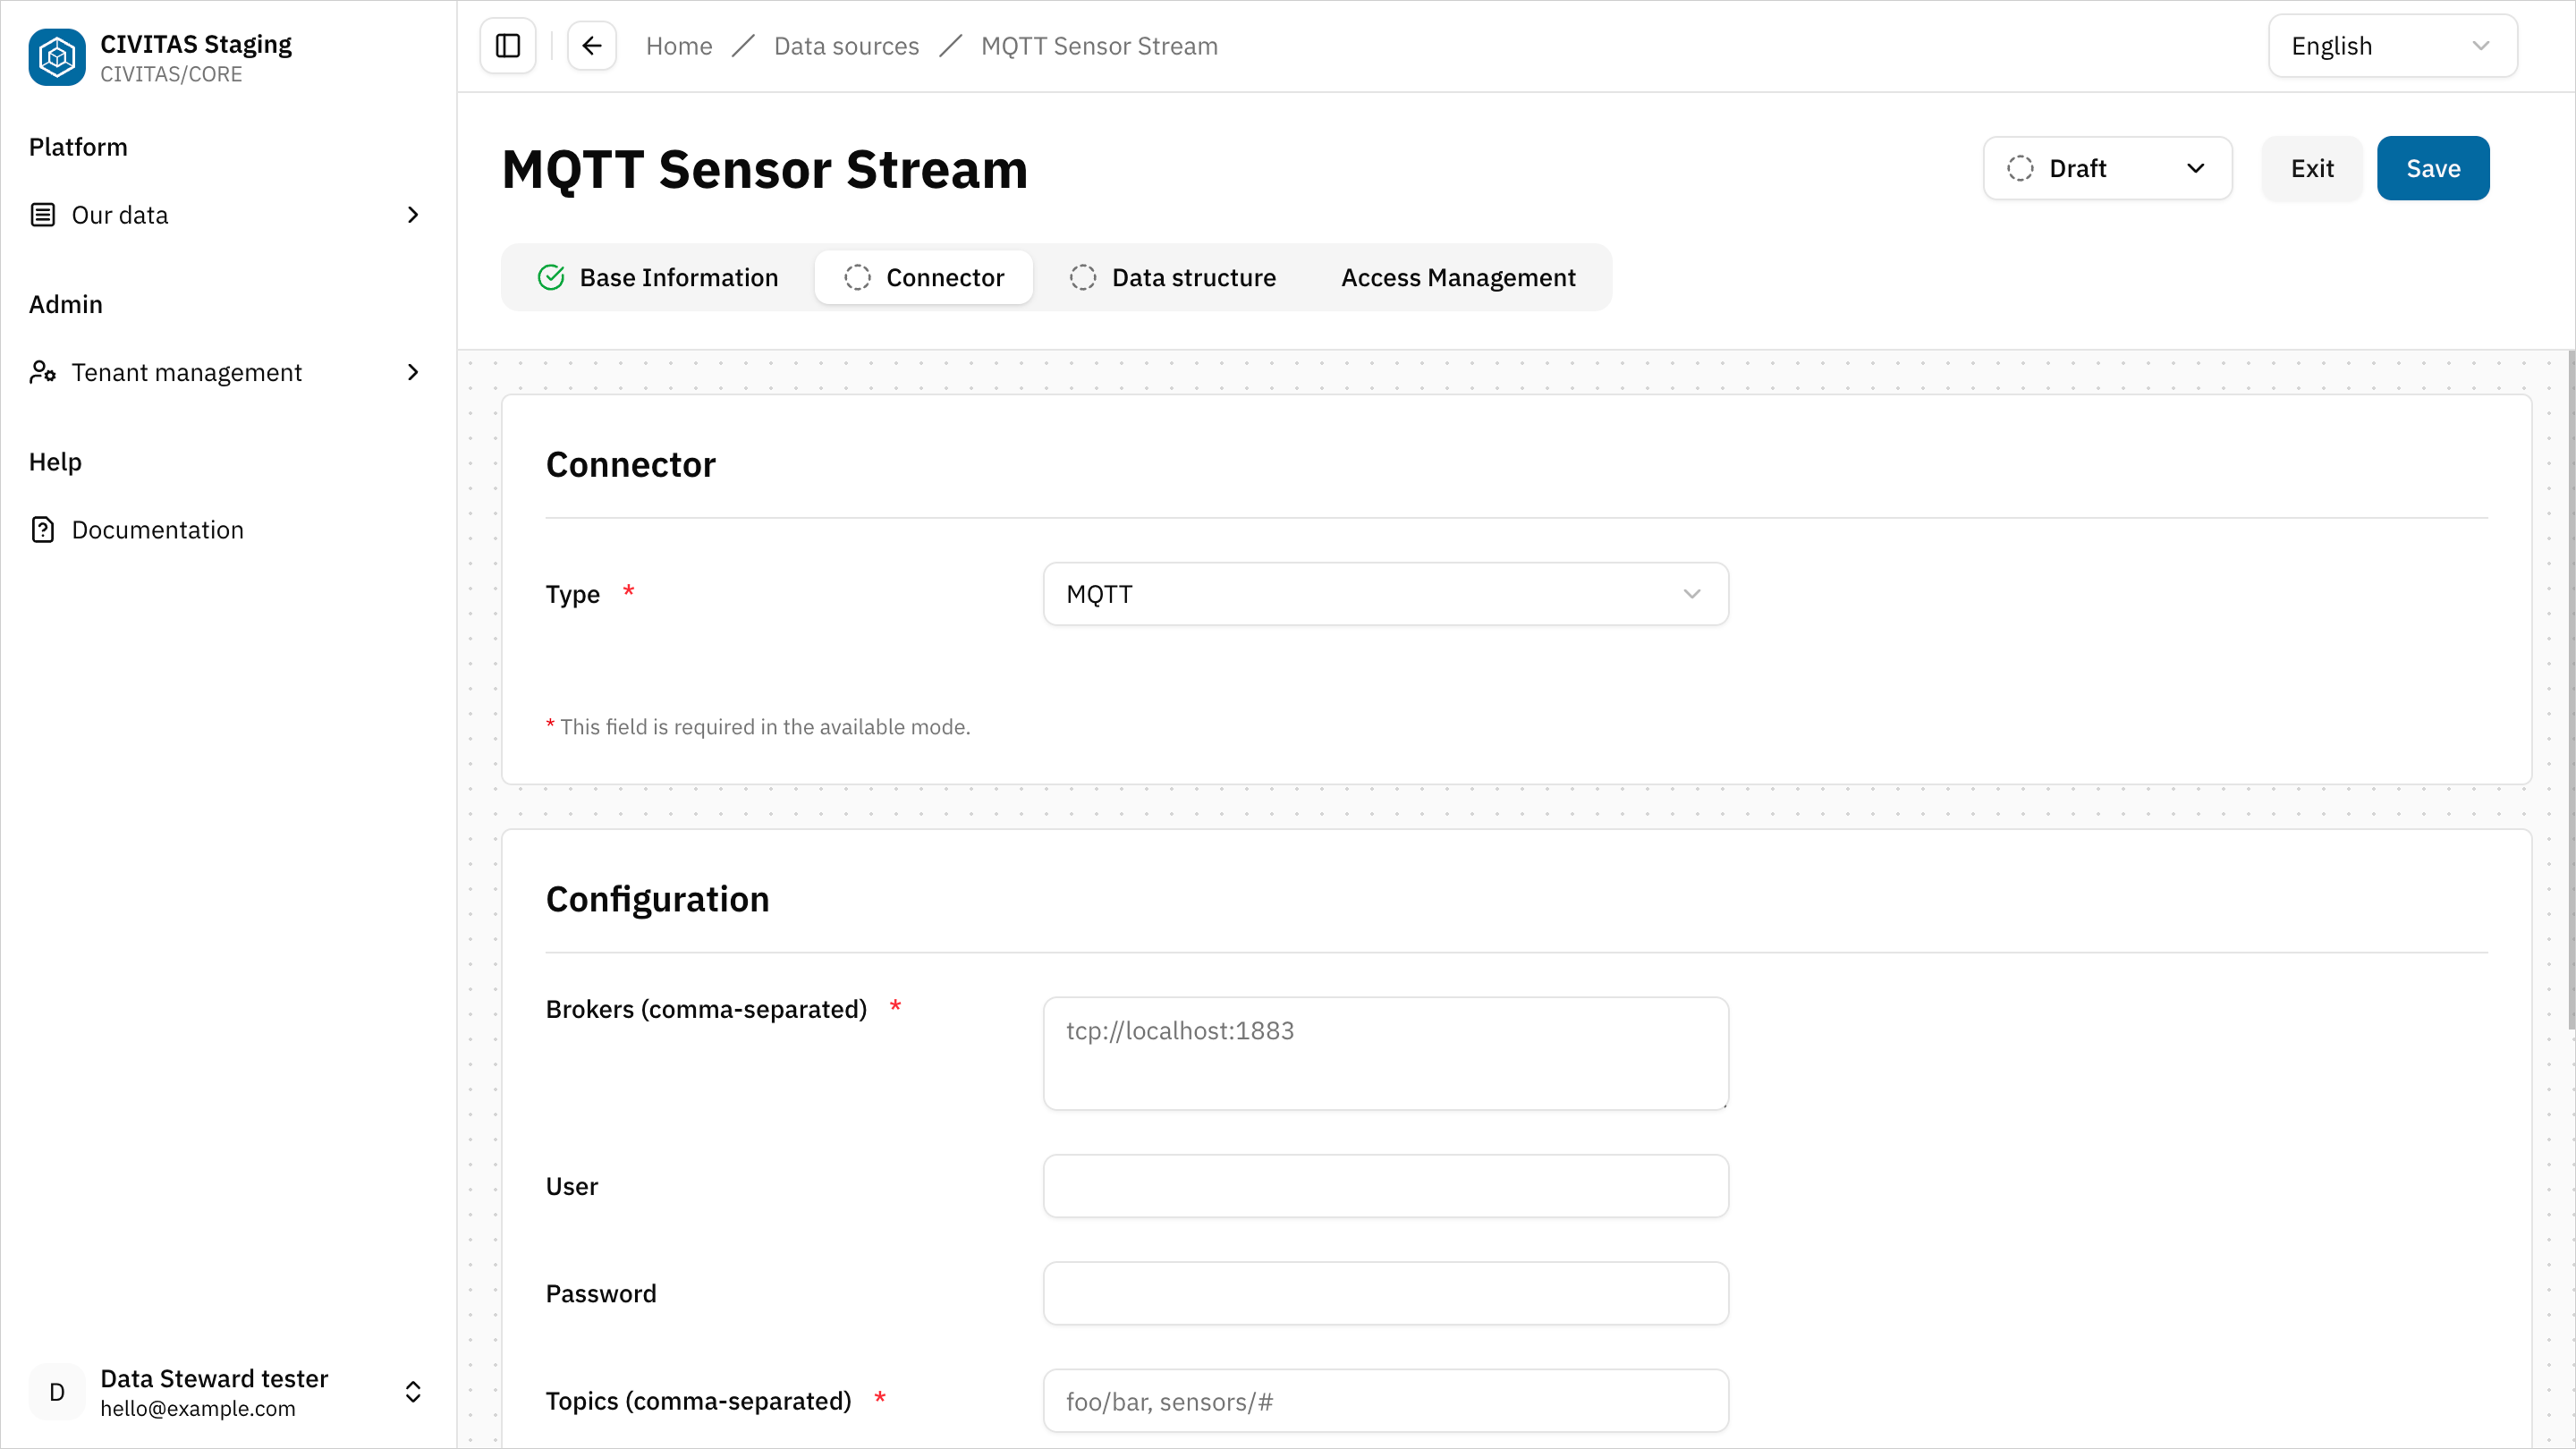
This PostgreSQL Data source provides the master data used to provision SensorThings entities in the backend.
Example: PostgreSQL database
Step 7: Import a Data structure
→ Only Data structures that have been made available beforehand can be selected
- Open the Data structure tab
- Click Import and select the Data structure from Platform you created earlier
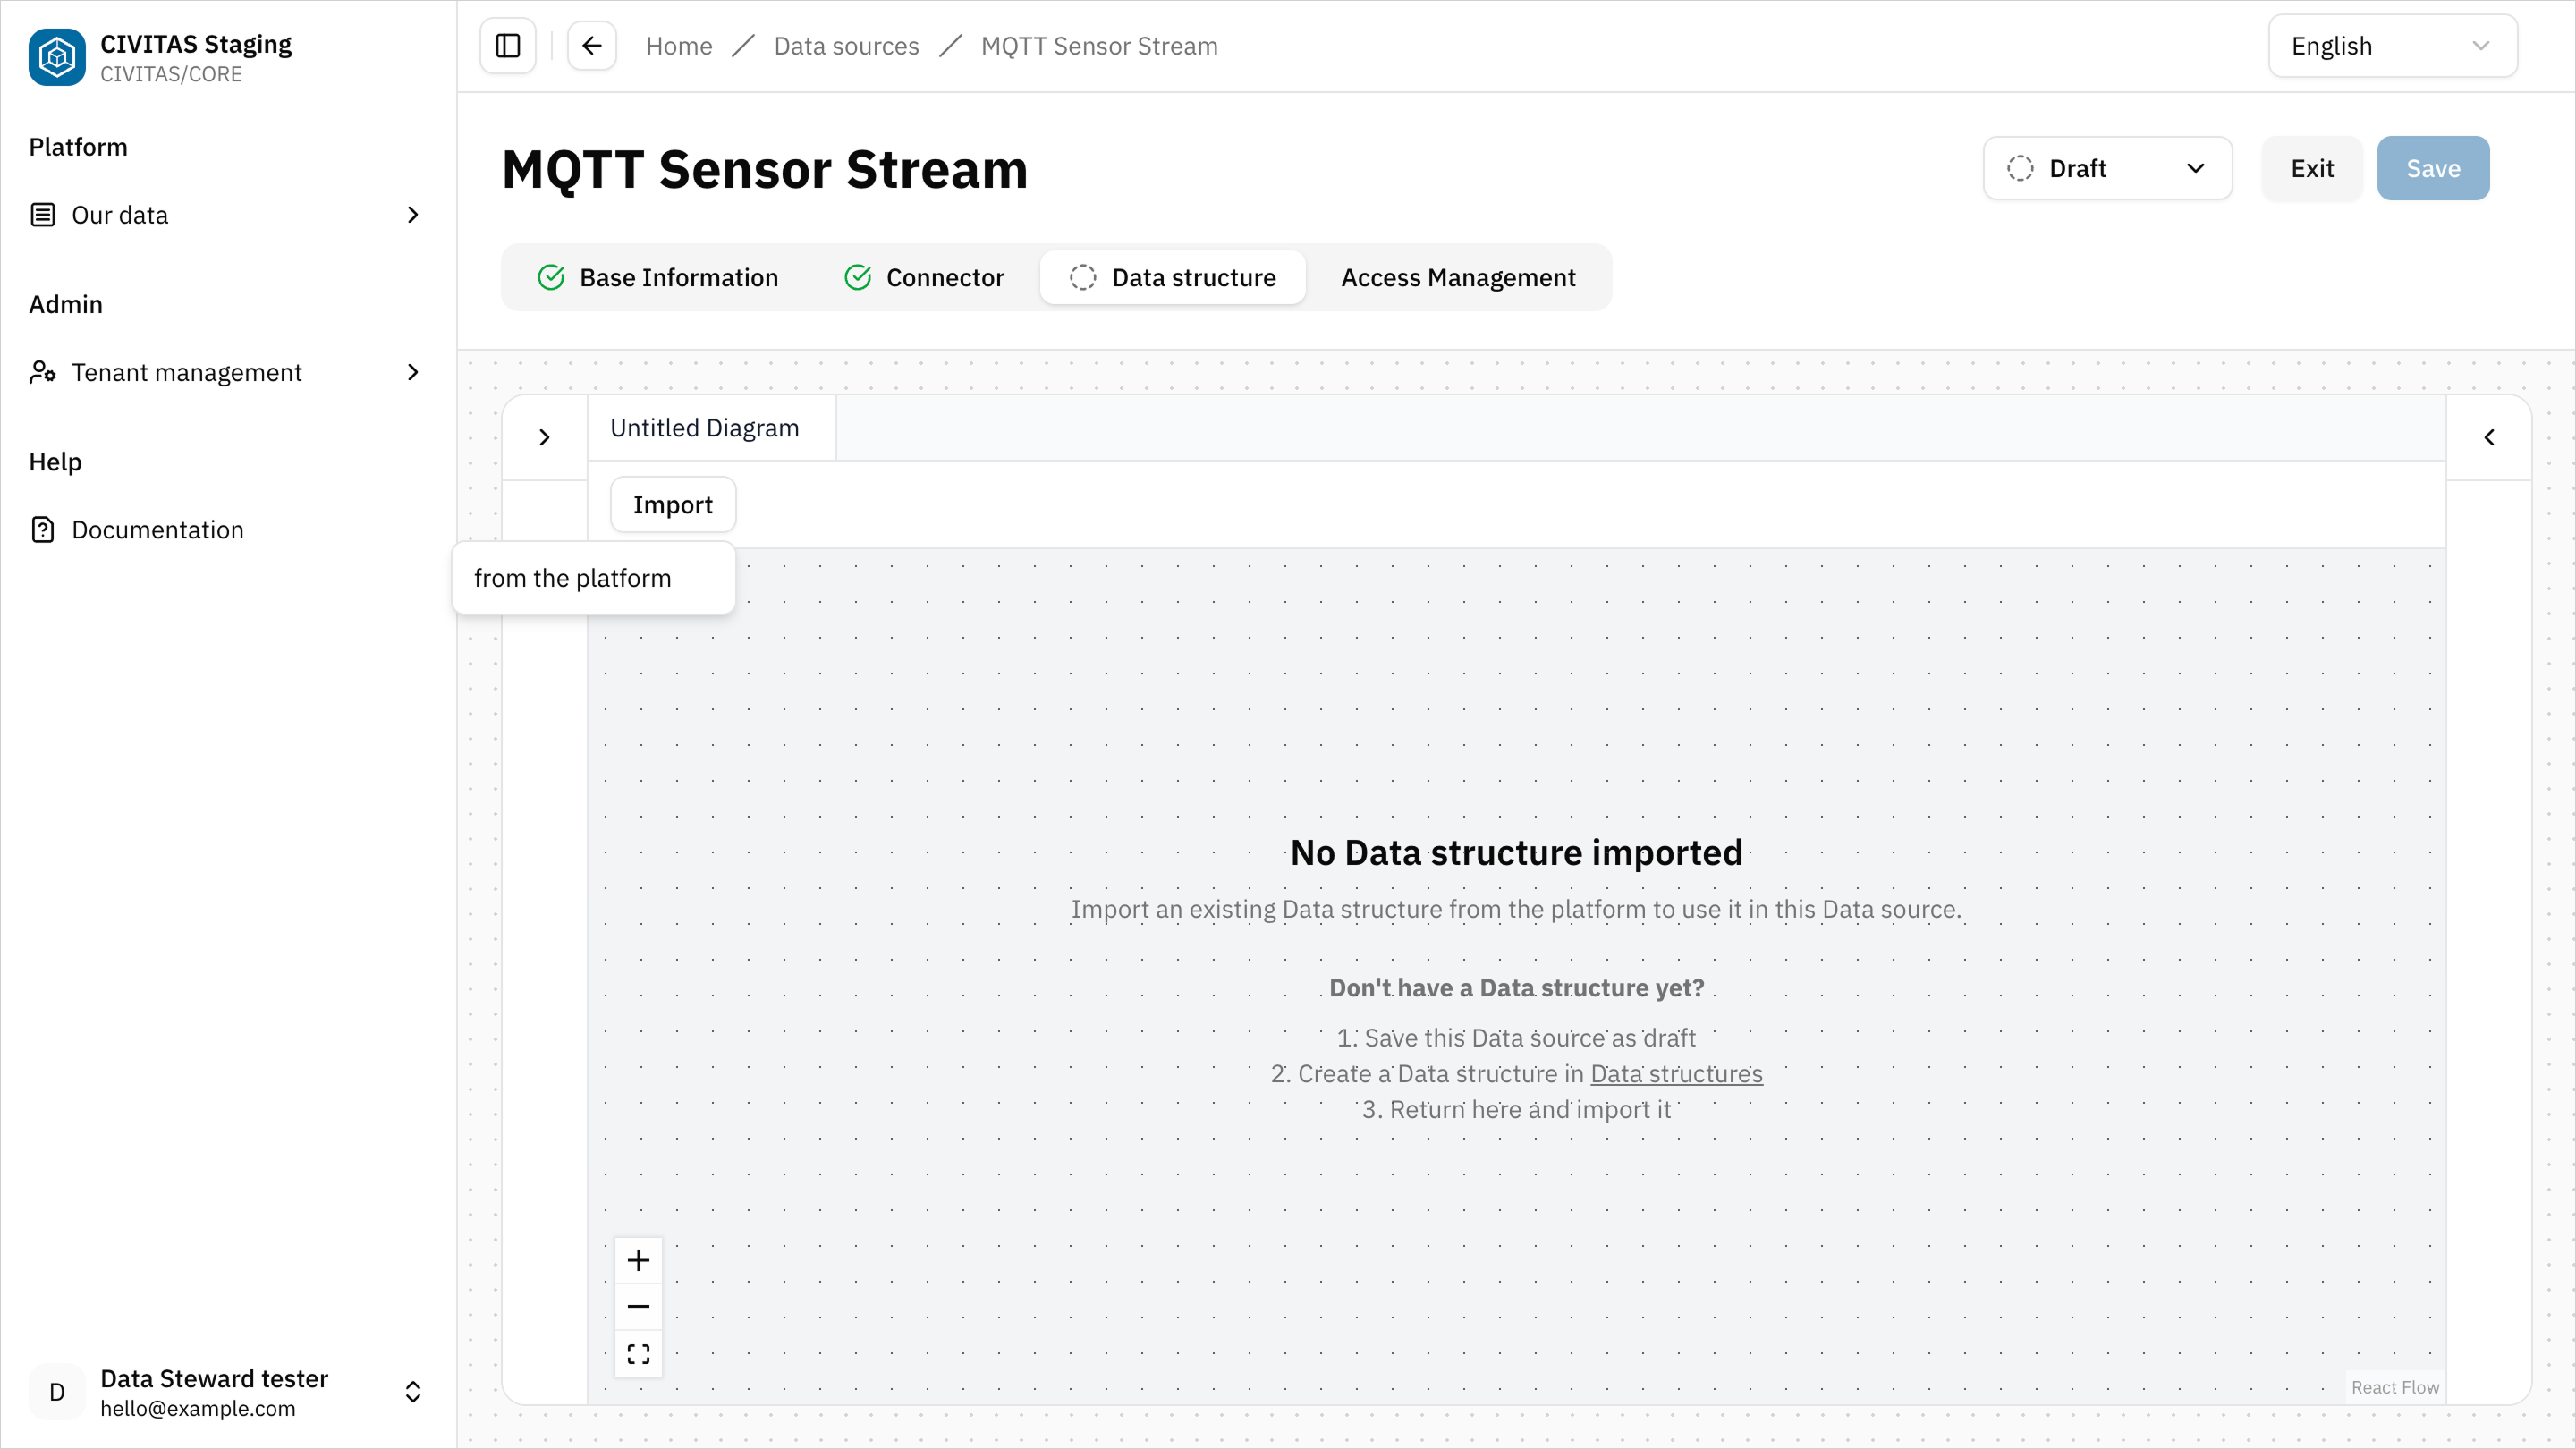
Assign the Data structure that models the SensorThings master data.
Step 8: Manage access permissions
- Open the Access Management tab
- Add a Group
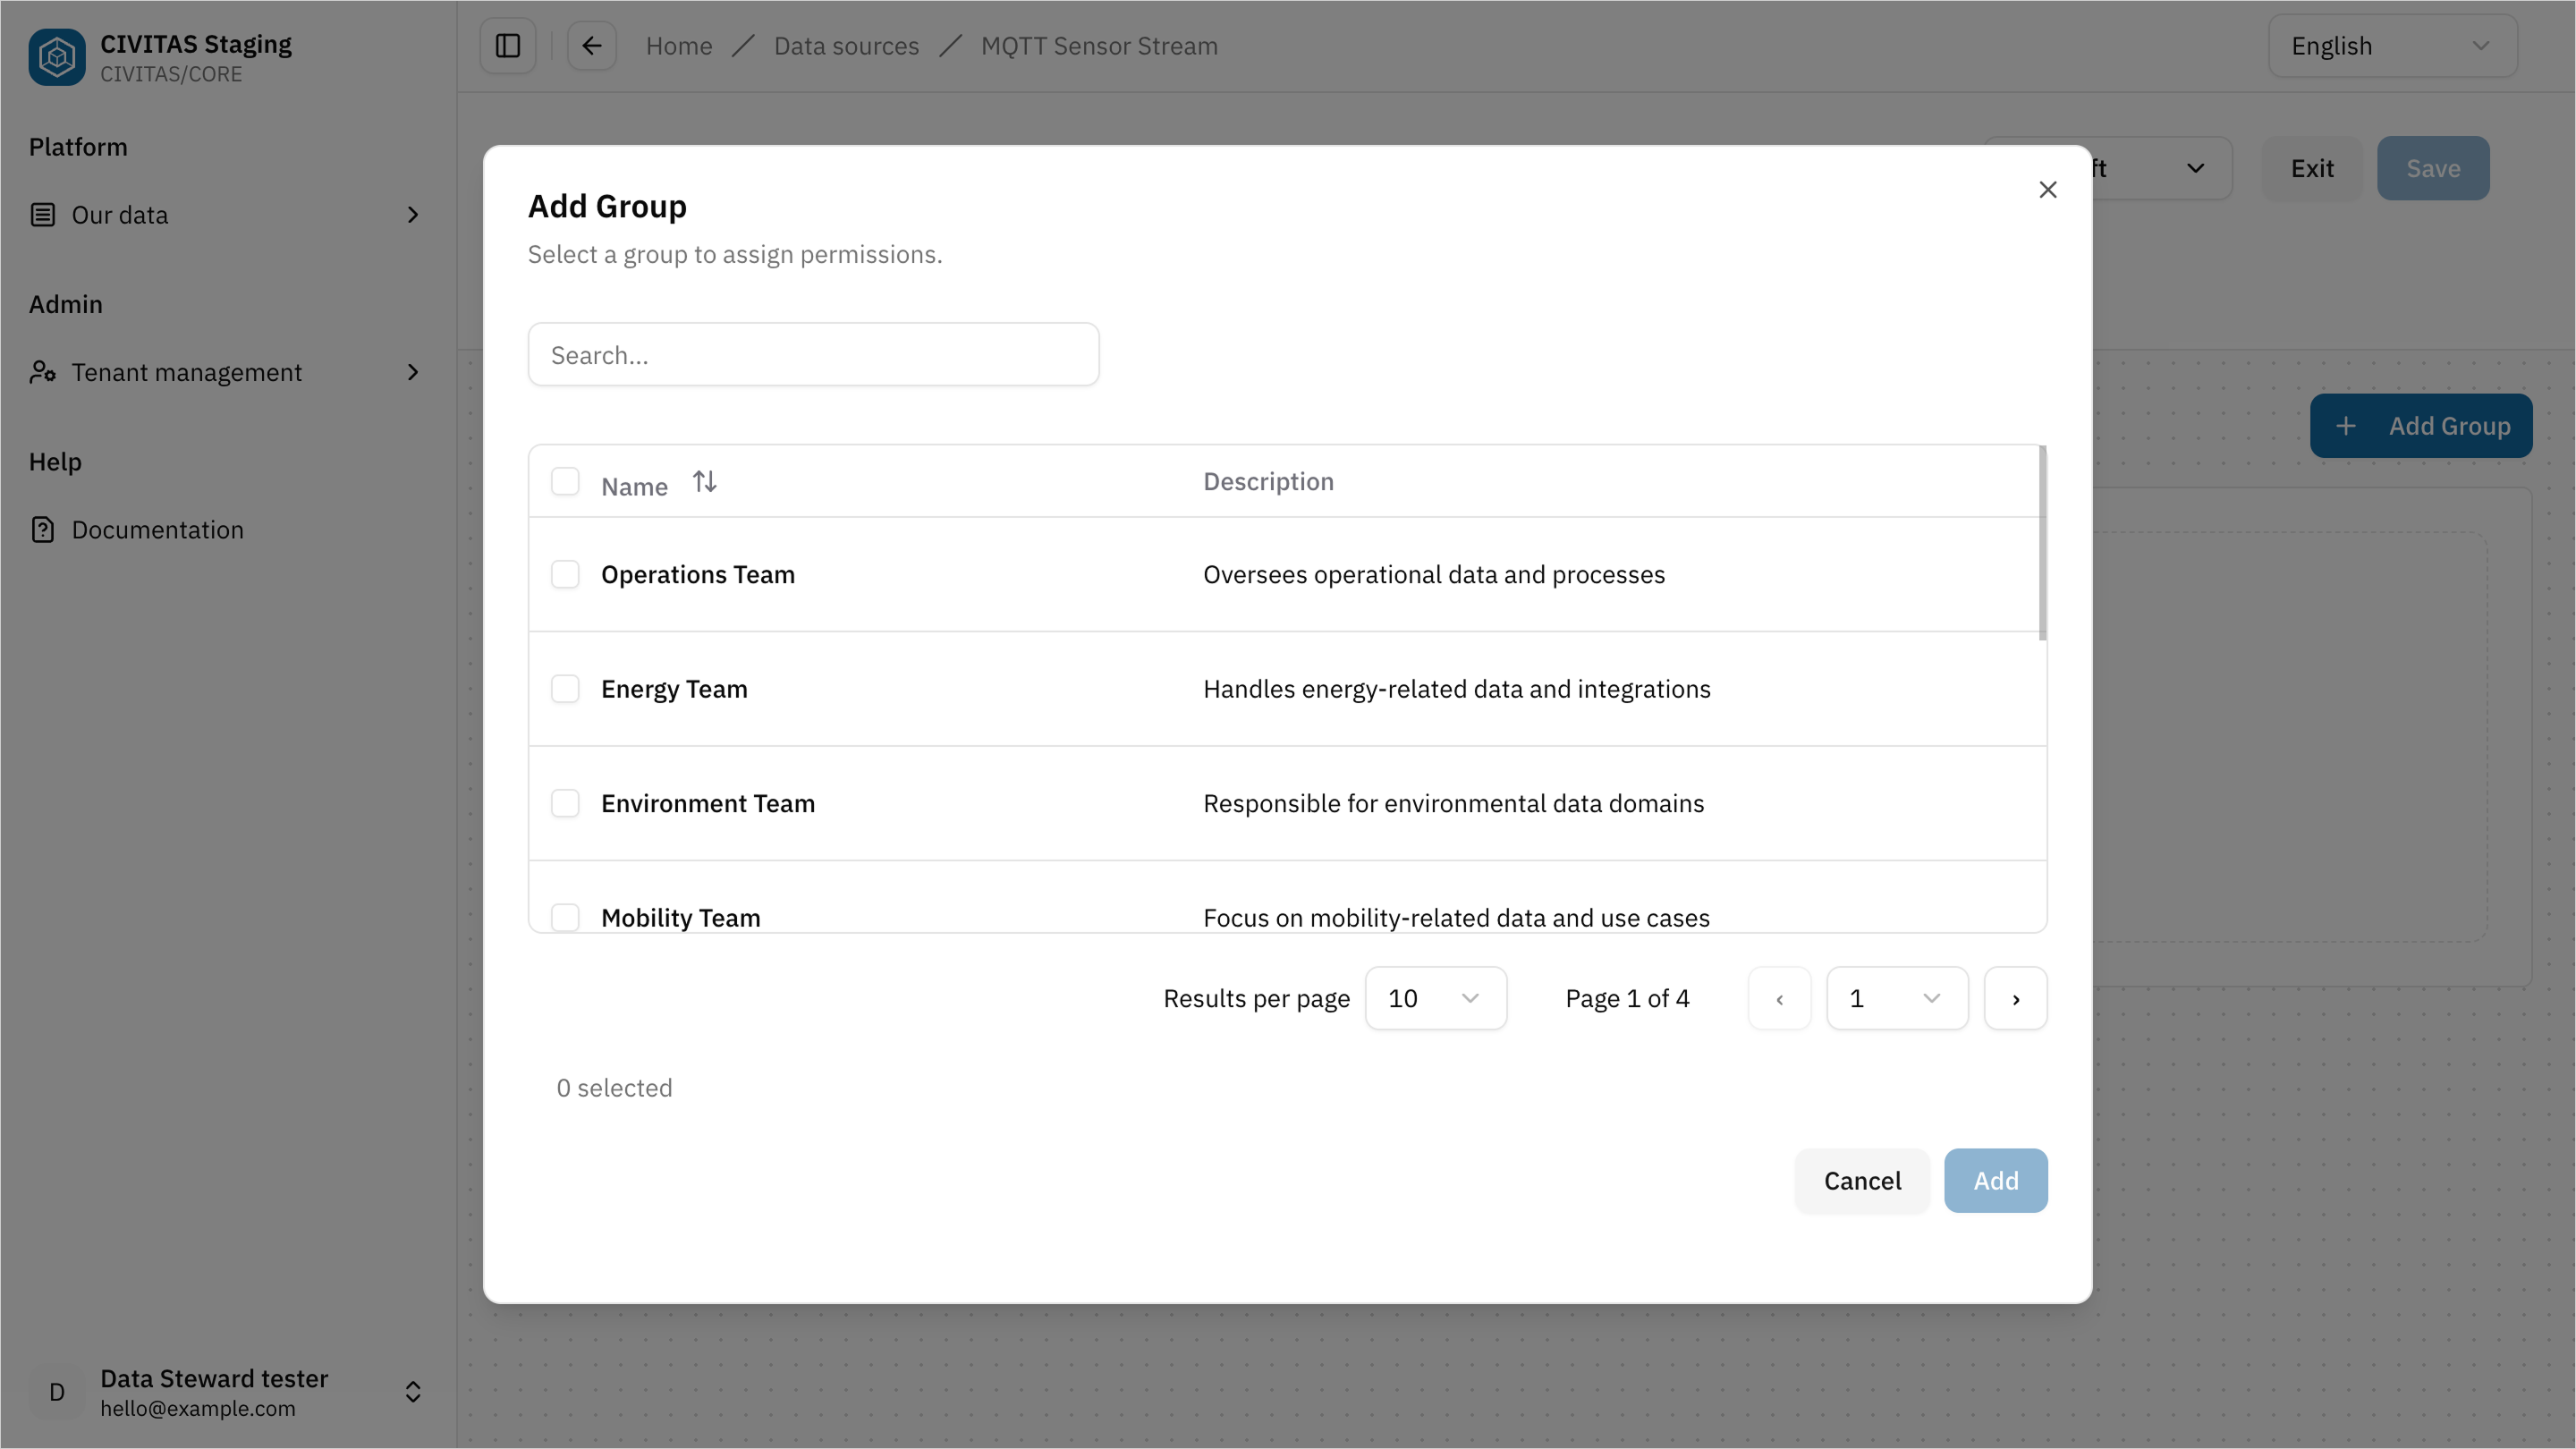
- Assign a Role to the Group
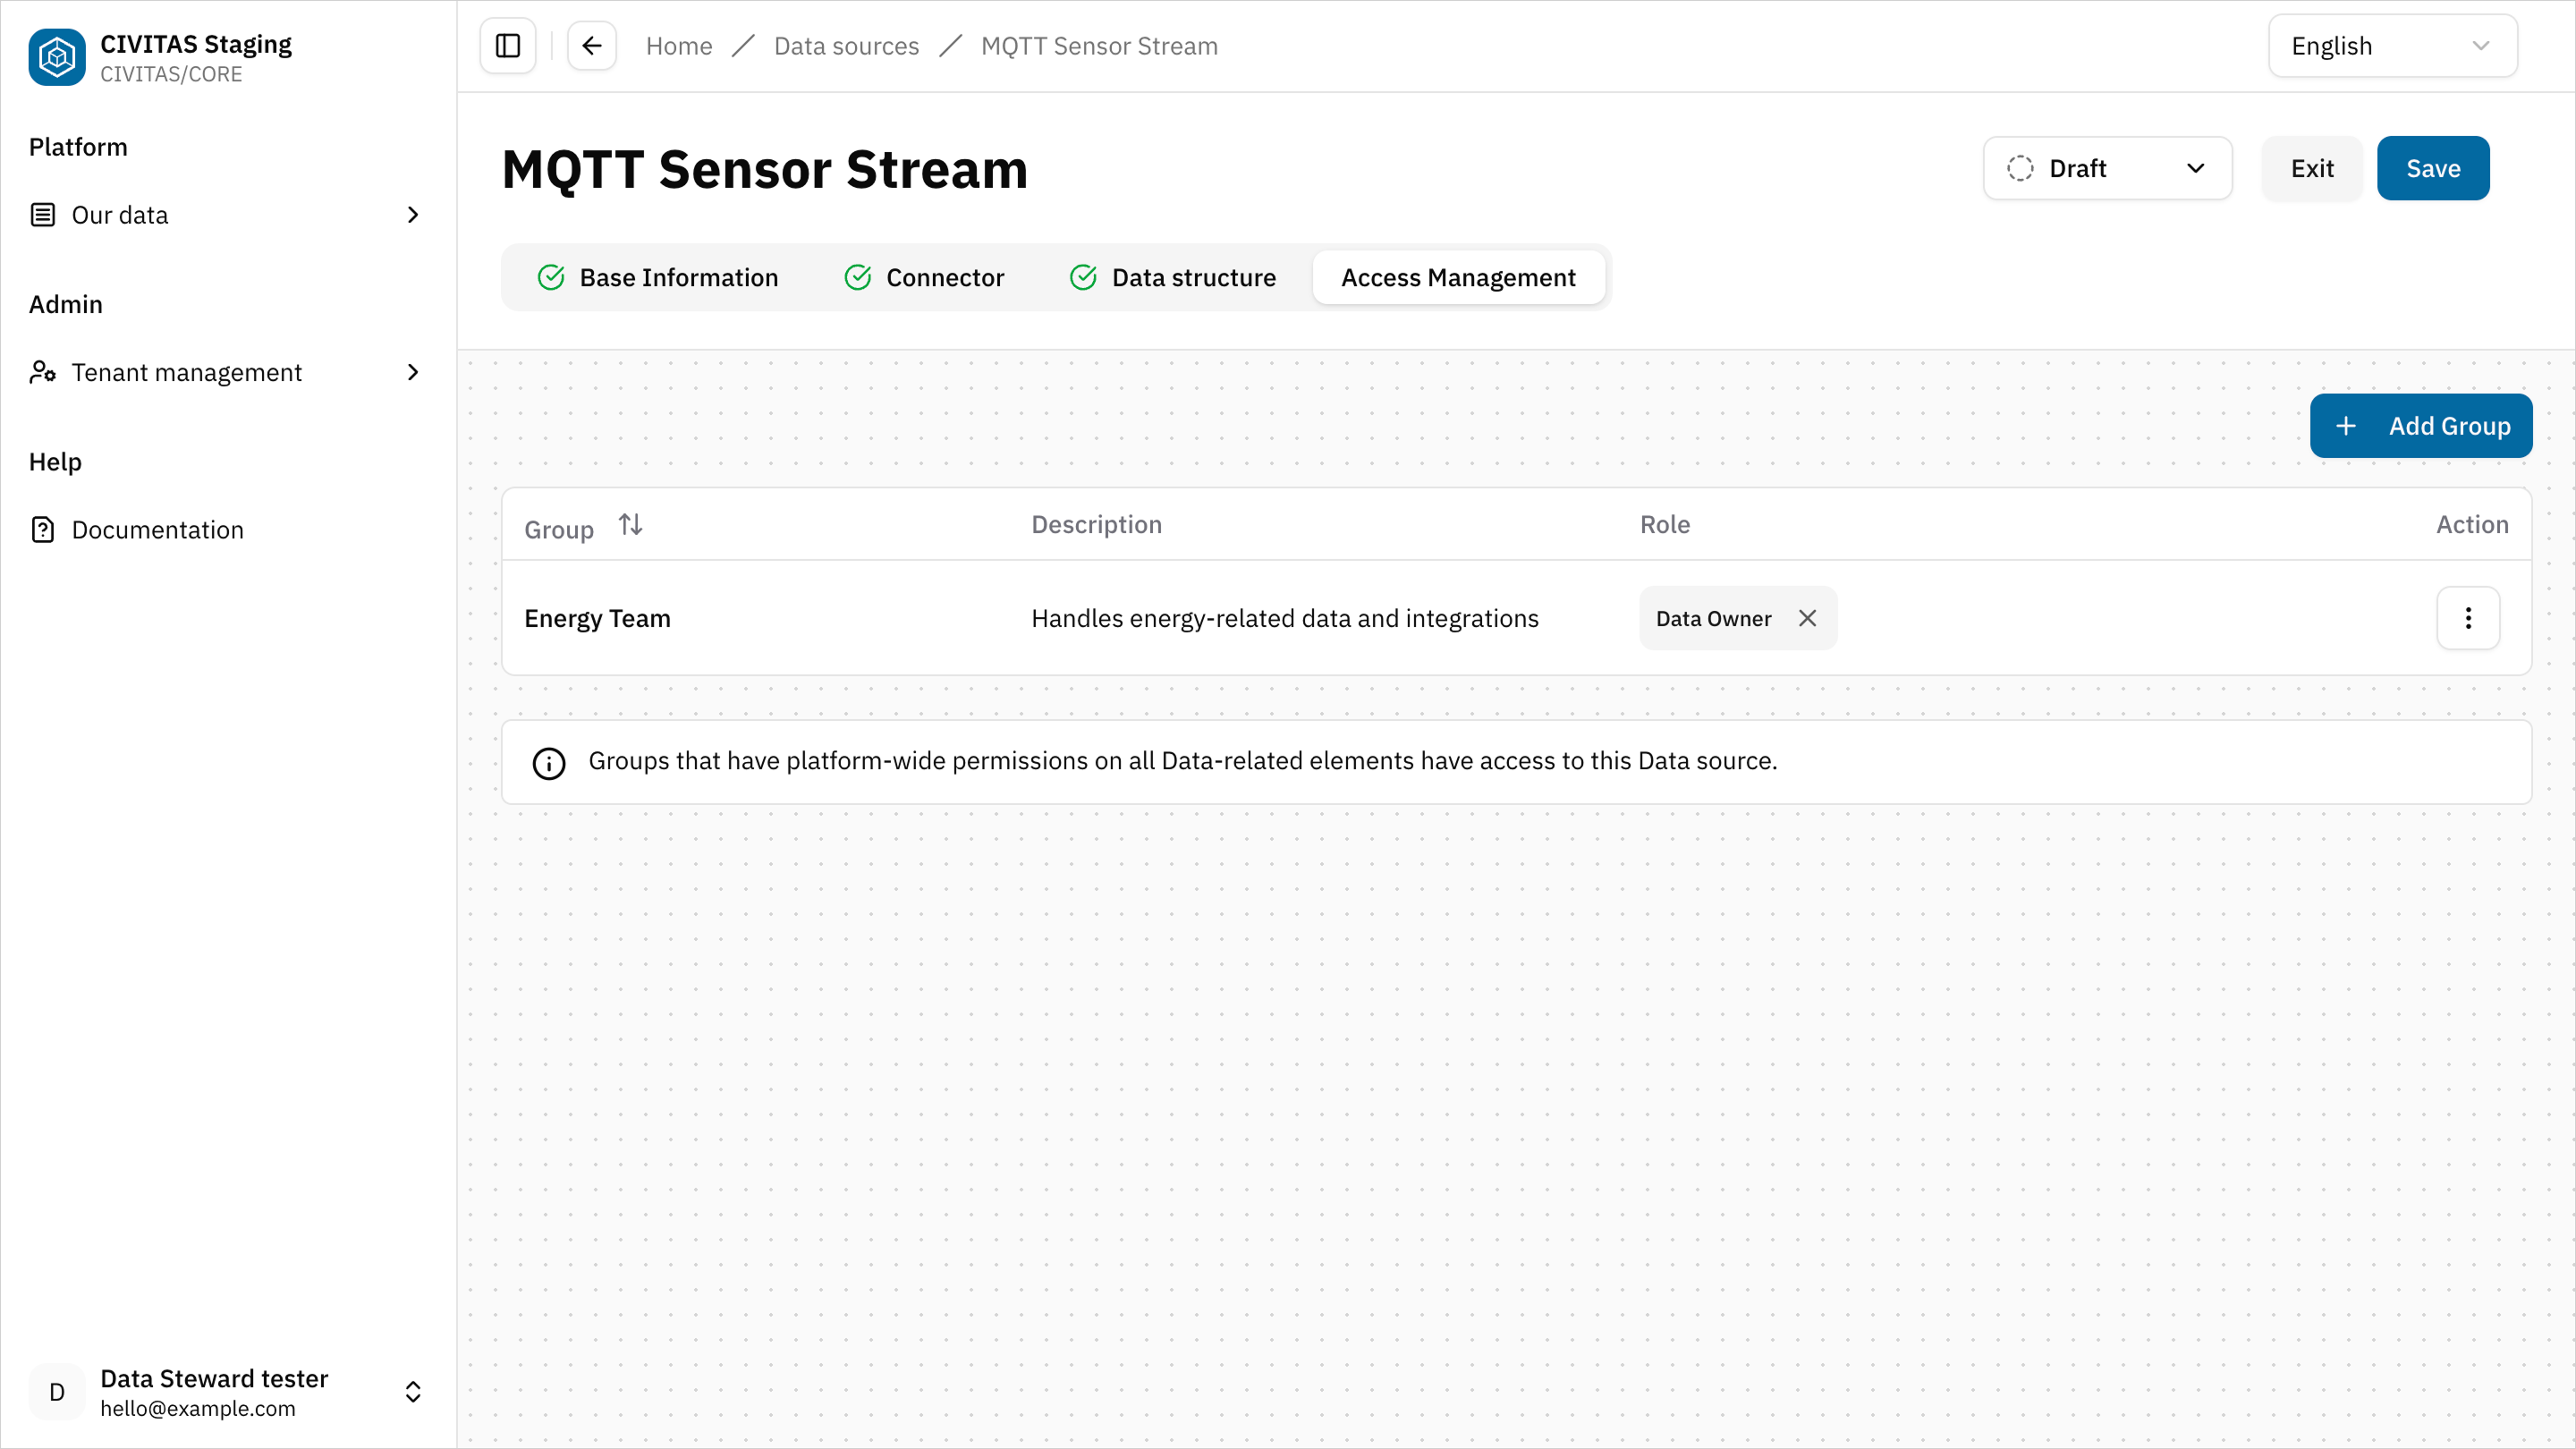
- Repeat these steps to add more Groups and Roles
- Hit Save and Exit
Step 9: Request release of the Data source
→ The release step ensures that Data sources are reviewed before they are used in production.
You cannot release the Data source without release permission.
- Contact a Data Owner or Data Gatekeeper to review and release it.
You can:
- share a direct link to the Data source
- or provide the name of the Data source
Release the Data source (Data Owner / Data Gatekeeper)
- Open the Data source
- Review the configuration and Base information
- Change the status from Draft to Available
Outcome
The Data source is Available and can now be used in pipelines.
Summary
You have successfully:
- Created a Data structure
- Connected a Data source
- Configured access permissions
- Made the Data source available
Next: Repeat this process for measurement data
Repeat Step 1 to Step 9 to create the Data structure and Data source for measurement data, using MQTT instead of PostgreSQL.
In Step 1: Create a Data structure set up the Data structure for incoming smart meter measurements.
Example Base information:
- Name: Smart Meter Energy measurement data
- Description: Structure for incoming smart meter measurement data
In Step 2: Define the Data structure use a Structure definition that describes the format of incoming measurement messages, for example:
- device identifier
- timestamp
- measurement values
In Step 5: Create a Data source set up the MQTT Data source for measurement data ingestion. It provides continuous sensor data that will later be transformed into Observations.
Example Base information:
- Name: Smart Meter MQTT measurement data
- Description: Measurement data source for incoming sensor values in Smart Meter energy
In Step 6: Configure the Connector in the Connector tab, select MQTT and enter the required configuration. It provides continuous measurement data from sensors via a subscribed topic. The incoming messages will later be transformed and stored as Observations linked to existing Datastreams.
Example:
- Broker: mqtt.example.com
- Topic: taf10/sensors
In Step 7: Import a Data structure assign the Data structure that describes the format of incoming MQTT messages.
Outcome
This setup prepares both data flows required in Smart Meter energy usage.
→ In the next How-to Guide Persist & transform data, you will connect them in pipelines and transform the data for further use.
Next
You have connected your Data sources and prepared them for further processing. In the next guide, you will:
- build pipelines
- transform your data
- prepare it for consumption
→ Continue with Persist & transform data